FAQs/Integrations & tracking/RevSure Marketo Integration Implementation Guide
Integrations & tracking · RevSure FAQs

RevSure Marketo Integration Implementation Guide

1. Navigate to the data-hub module in the RevSure account. Click on the Add data source button

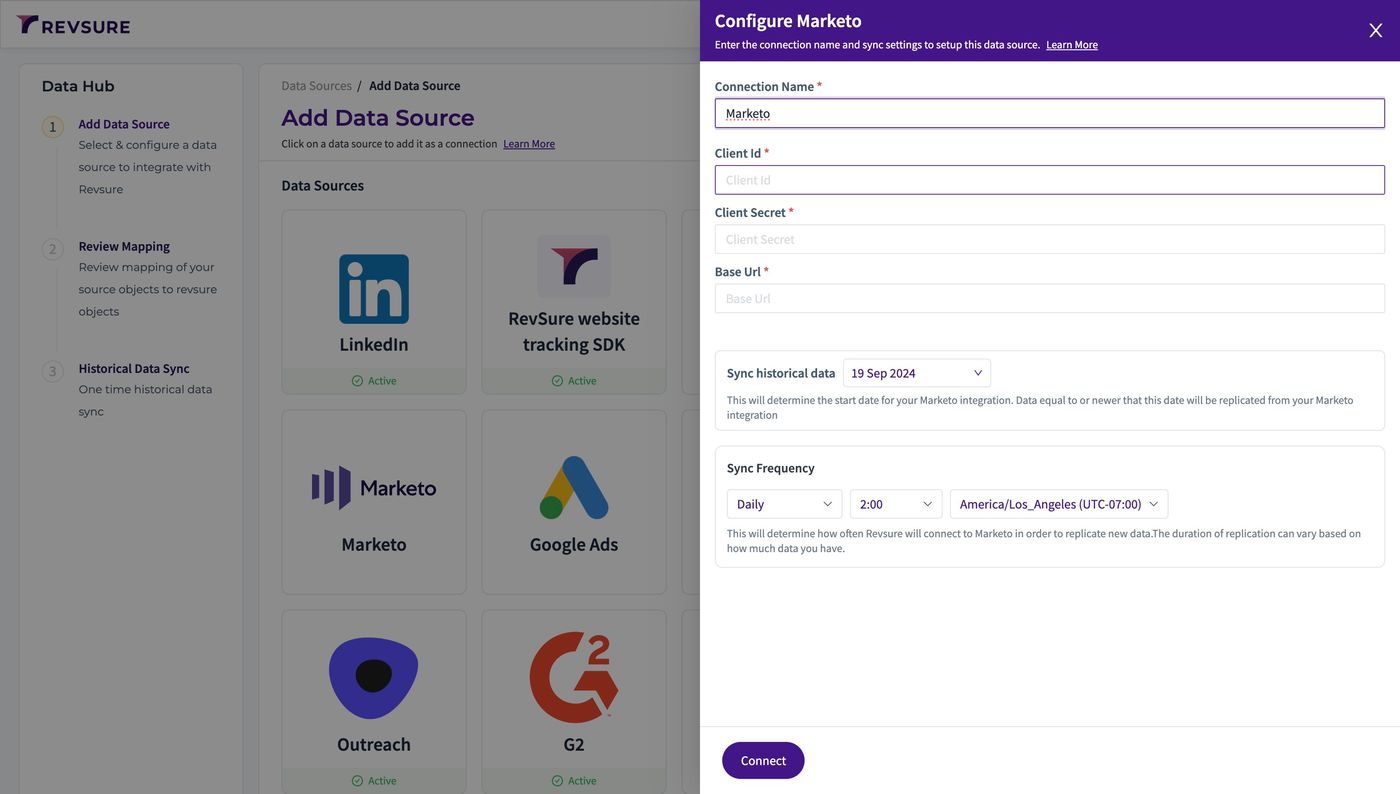
2. Select Marketo data source, and it will open a sidebar to configure the connection details
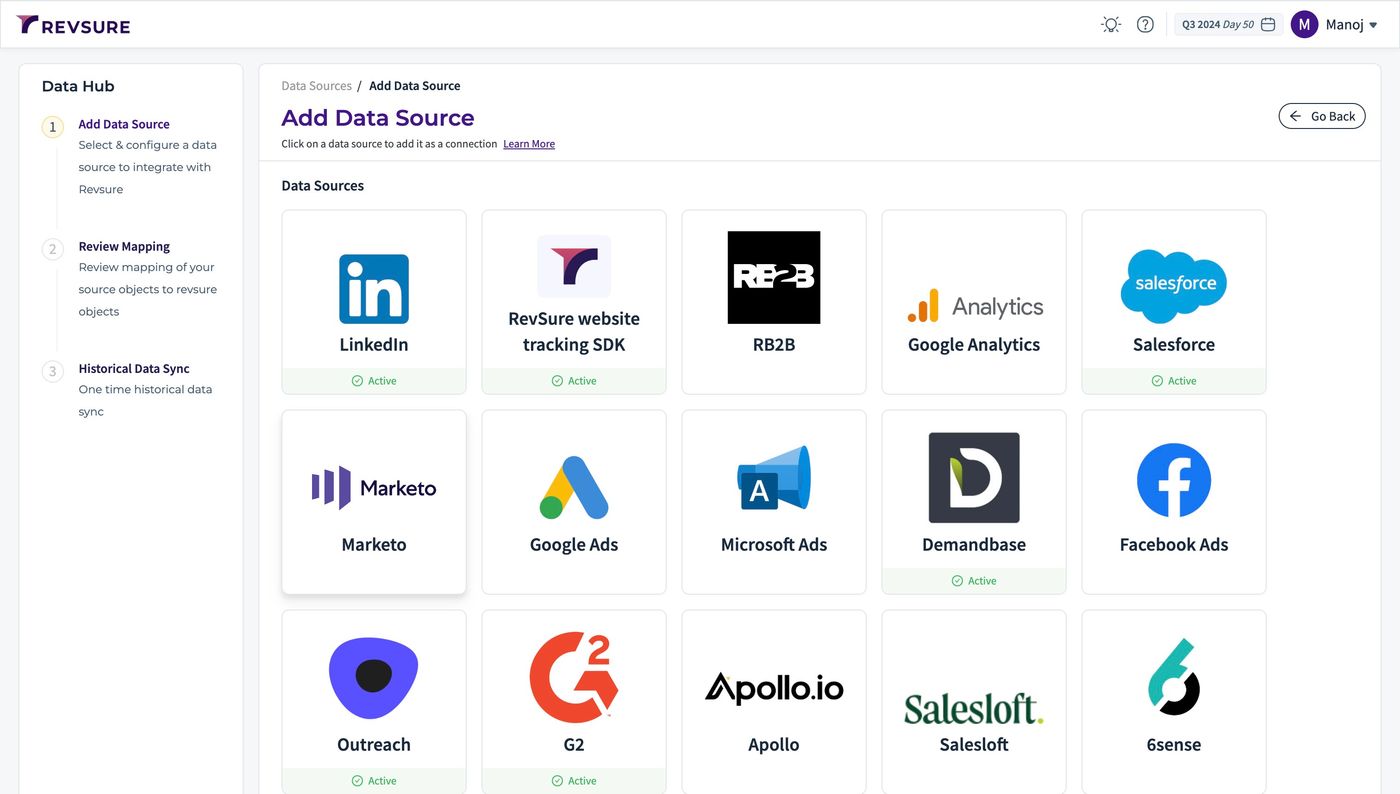
RevSure Marketo Integration Implementation Guide (figure 1)

3. Enter a unique connection name to identify the connection
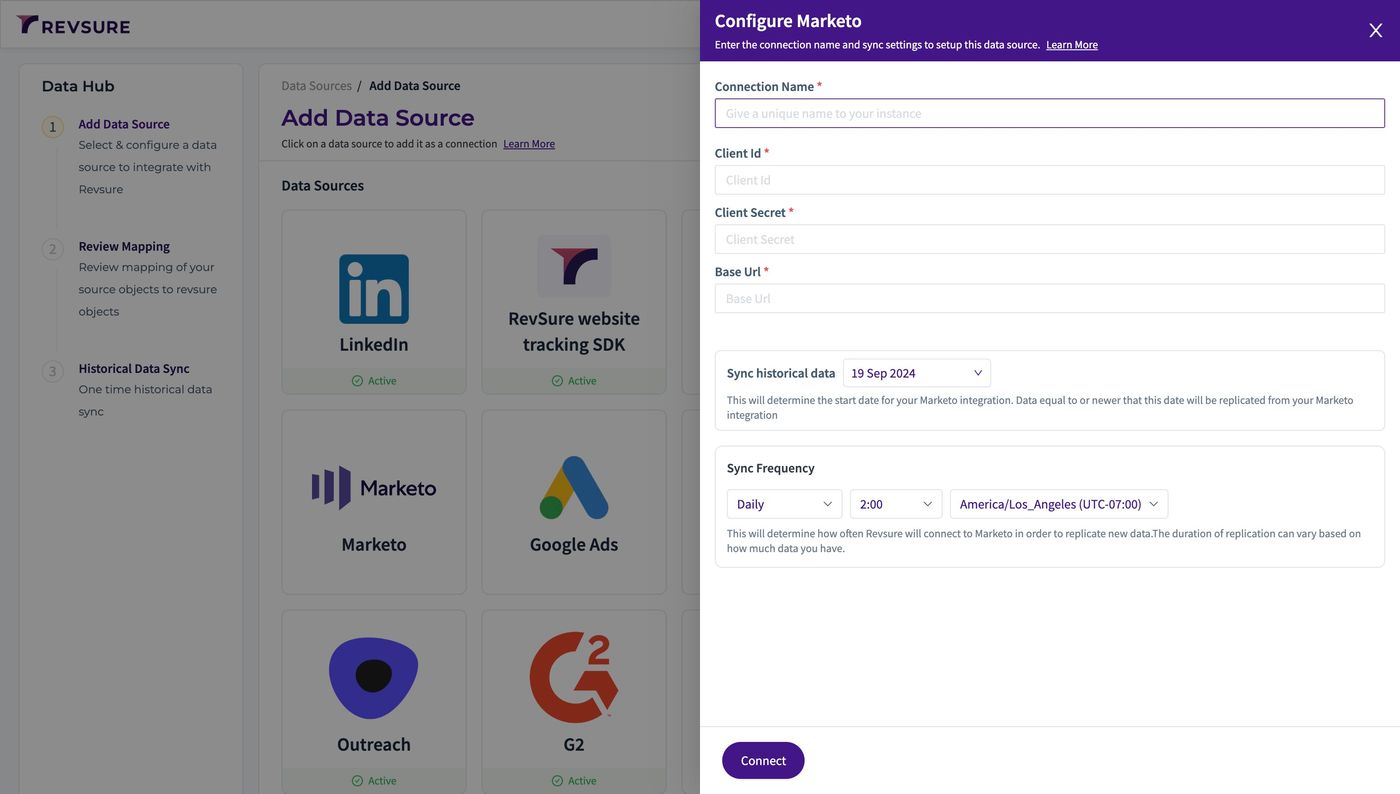
RevSure Marketo Integration Implementation Guide (figure 2)

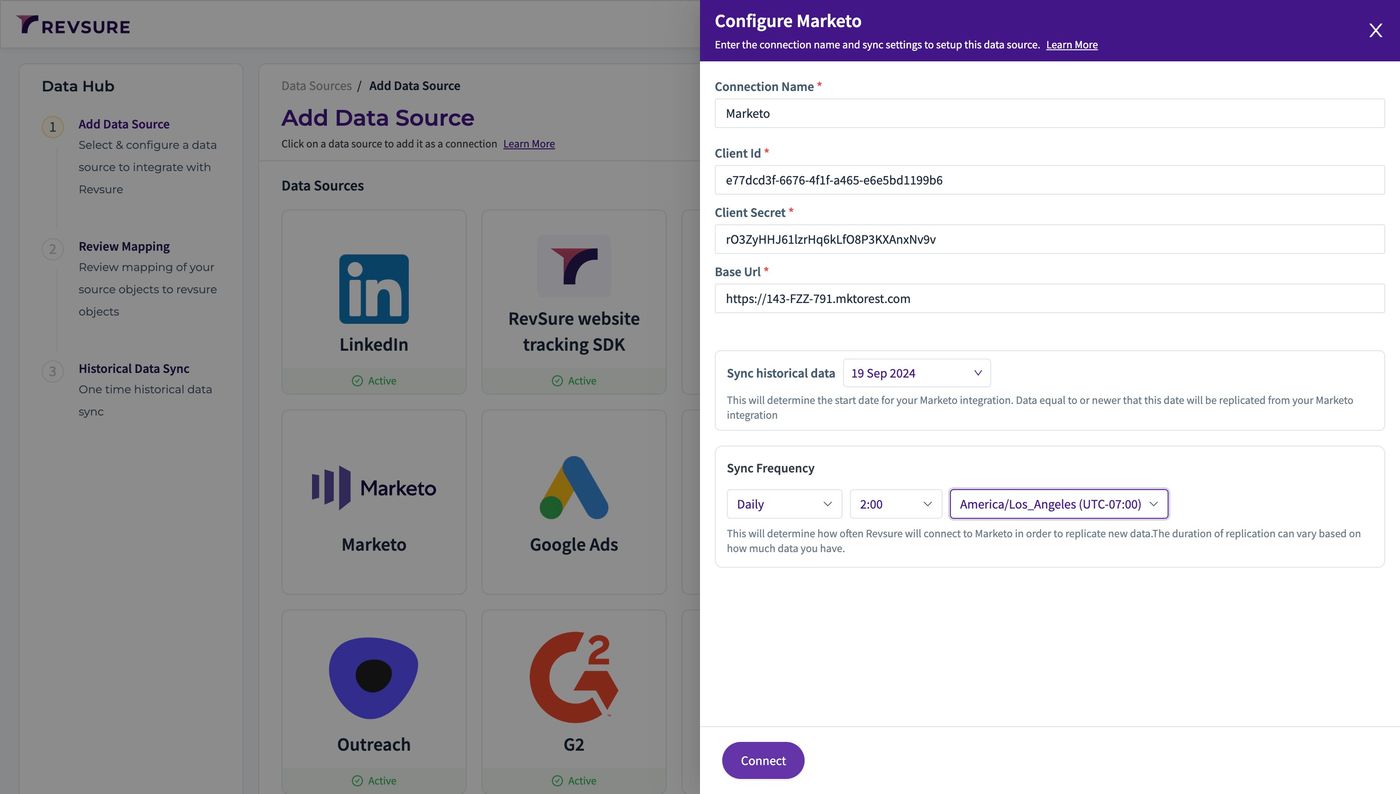
4. Click the "Client Id *" field

RevSure Marketo Integration Implementation Guide (figure 3)

5. Navigate to your Marketo Instance

We will be creating the following :

  1. Role
  2. User
  3. Web Service

6. In the Admin Page, Click "Users & Roles"
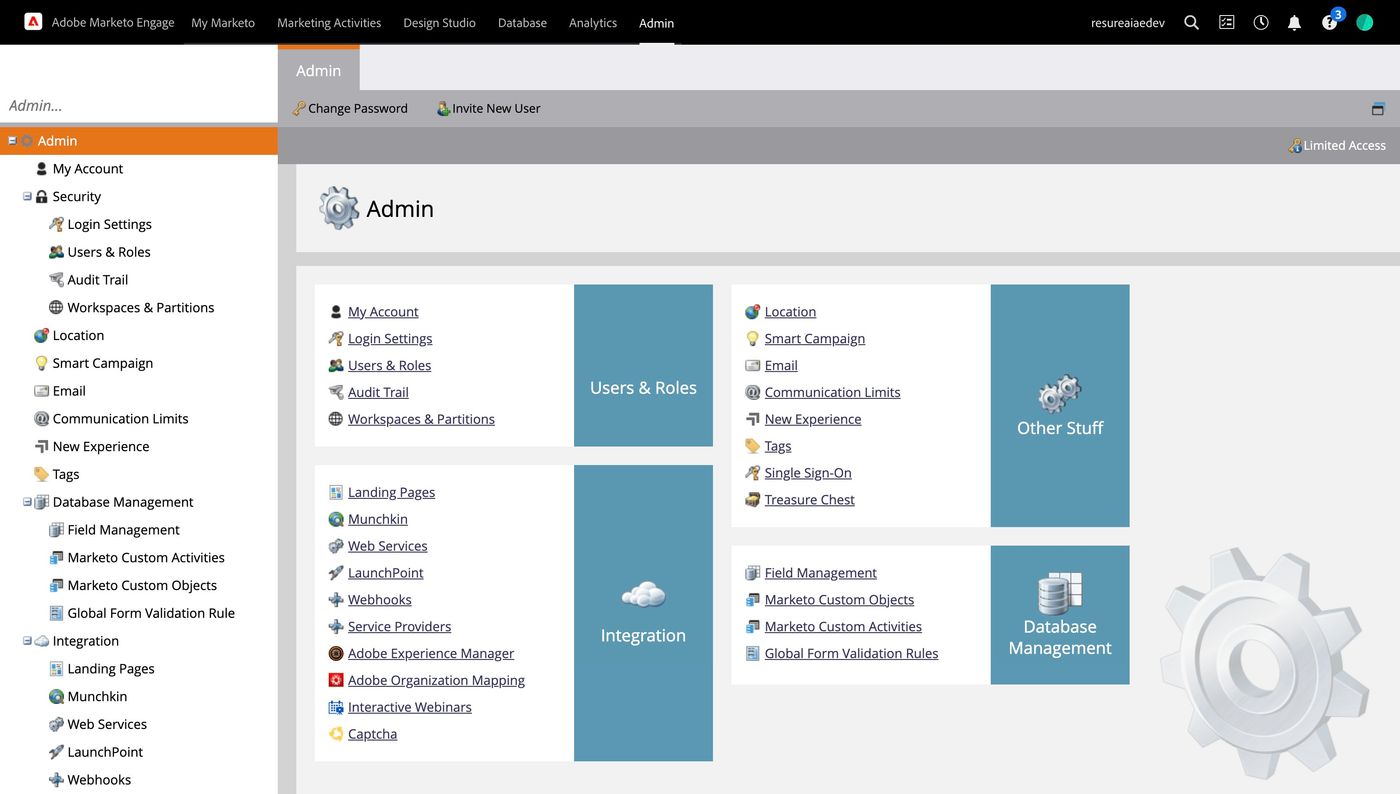
RevSure Marketo Integration Implementation Guide (figure 4)

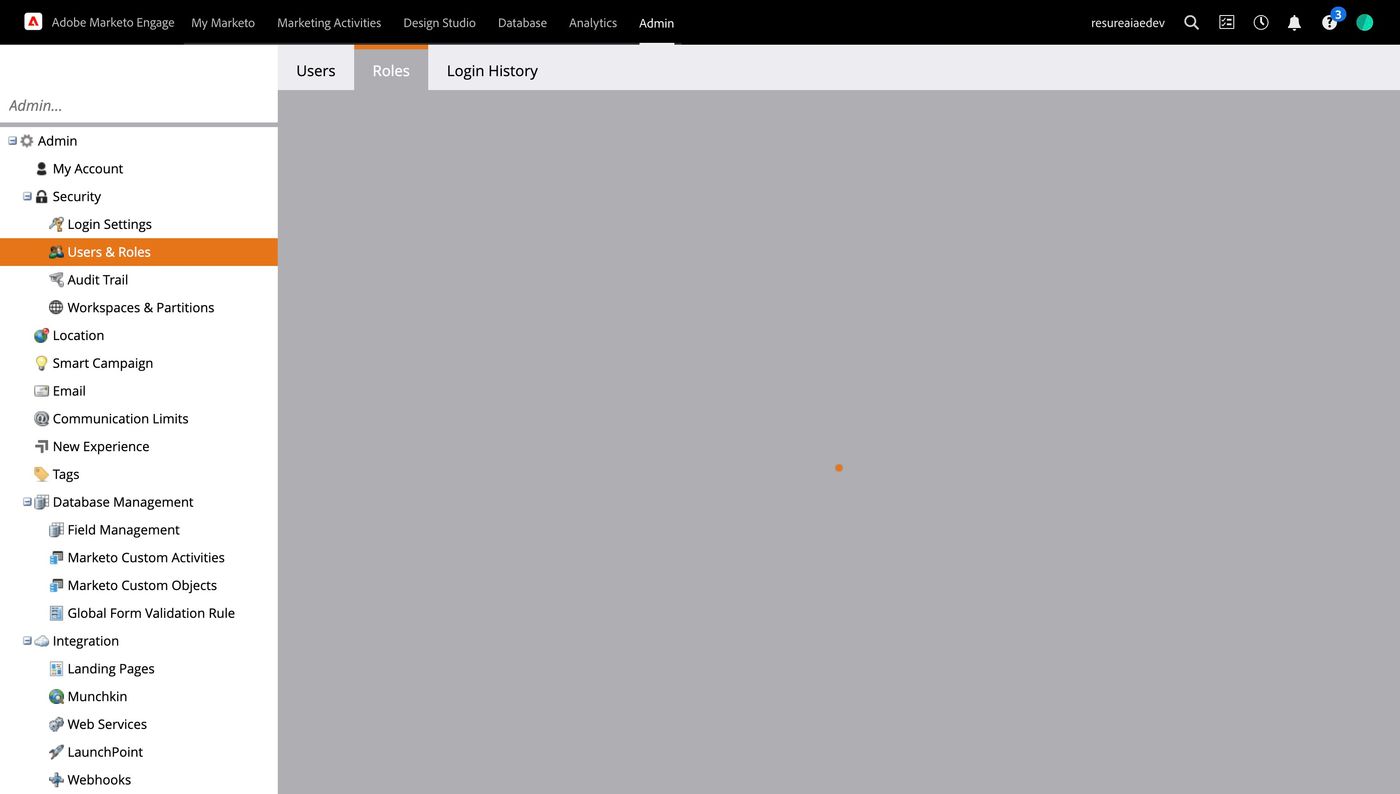
7. Click "Roles"

RevSure Marketo Integration Implementation Guide (figure 5)

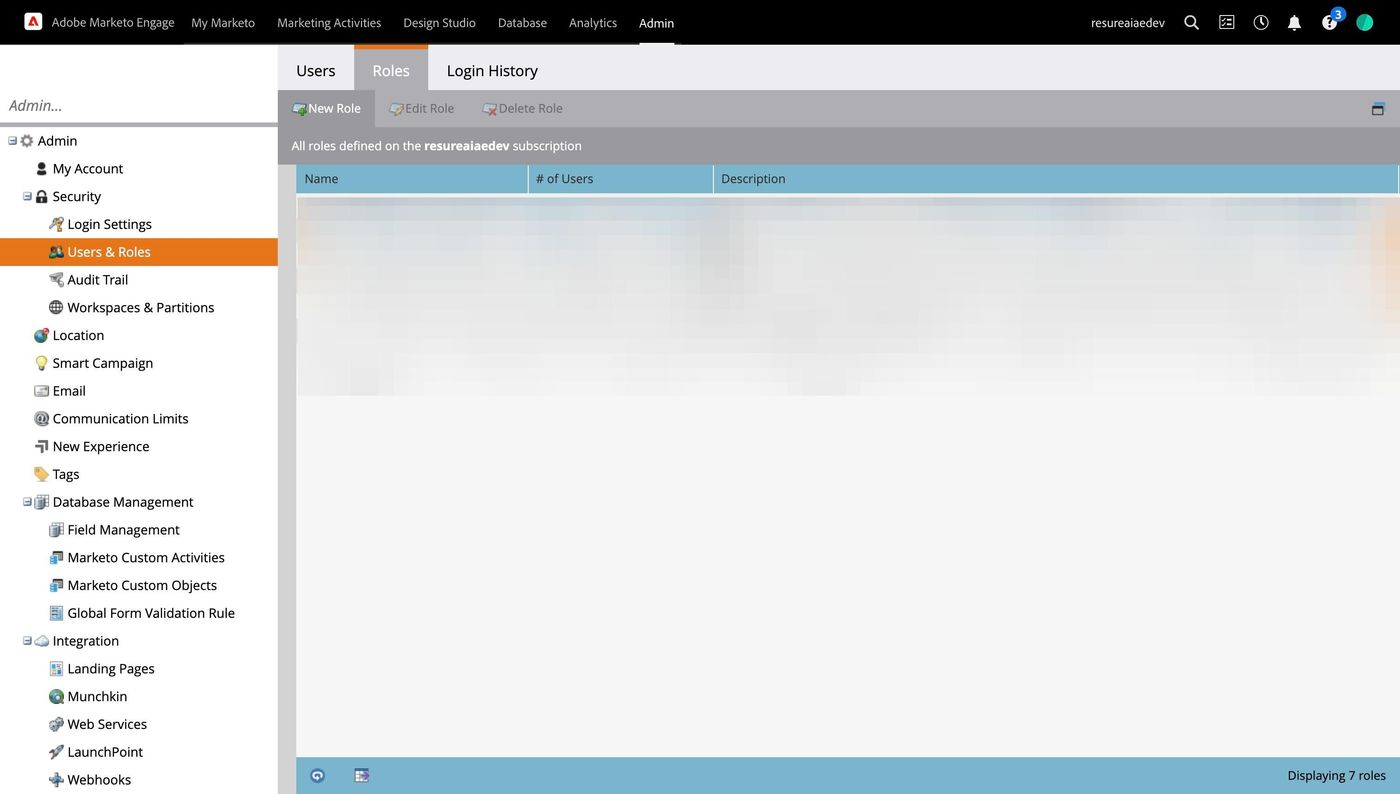
8. Click "New Role"

RevSure Marketo Integration Implementation Guide (figure 6)

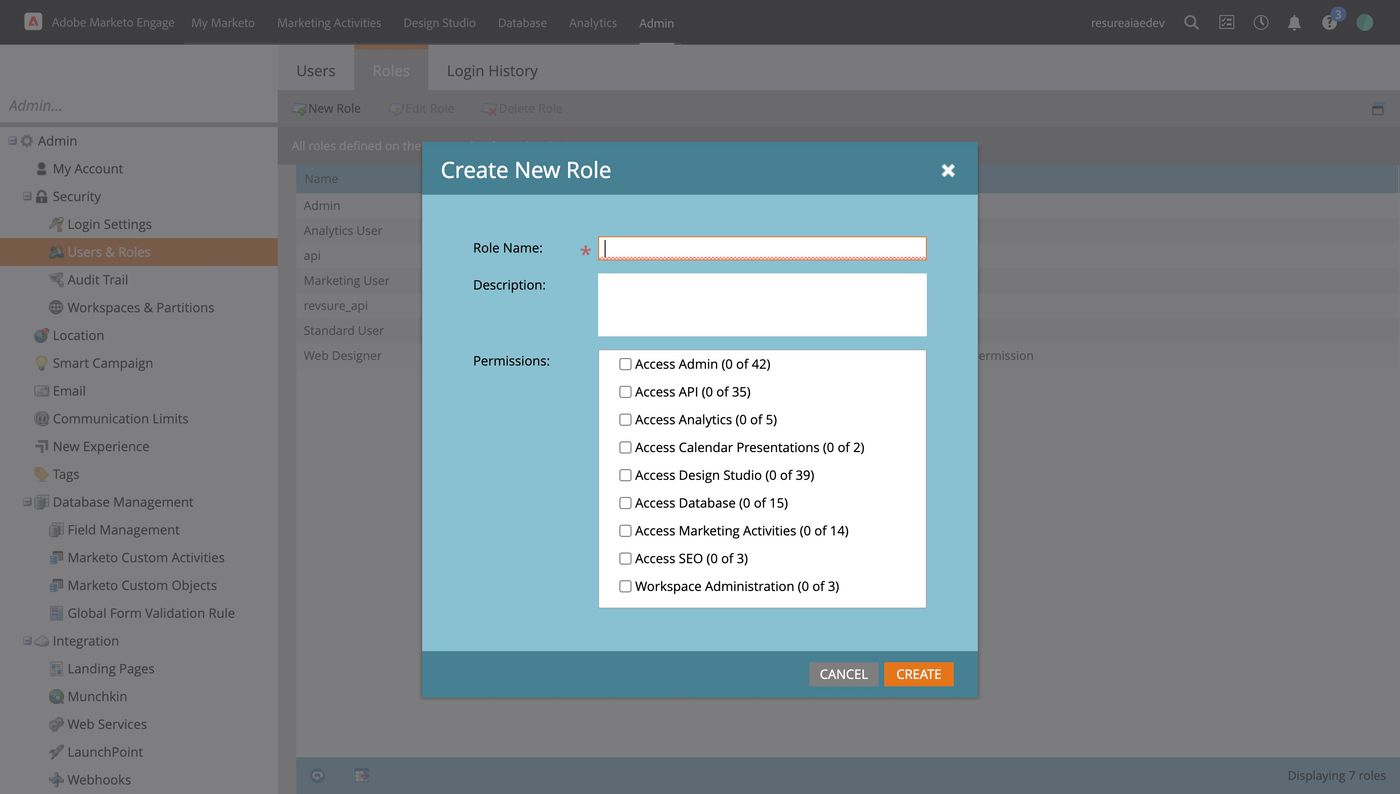
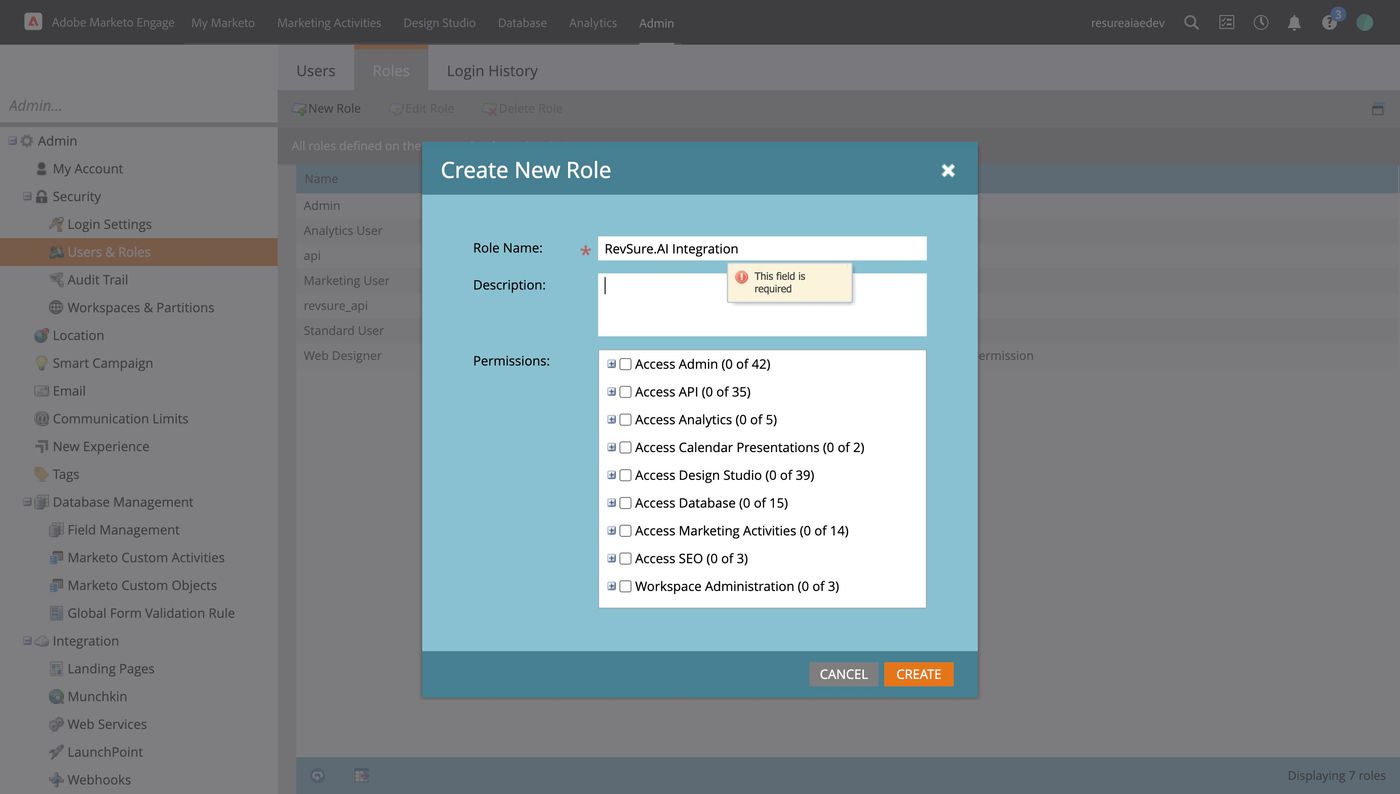
9. Click the "Role Name:" field.

RevSure Marketo Integration Implementation Guide (figure 7)

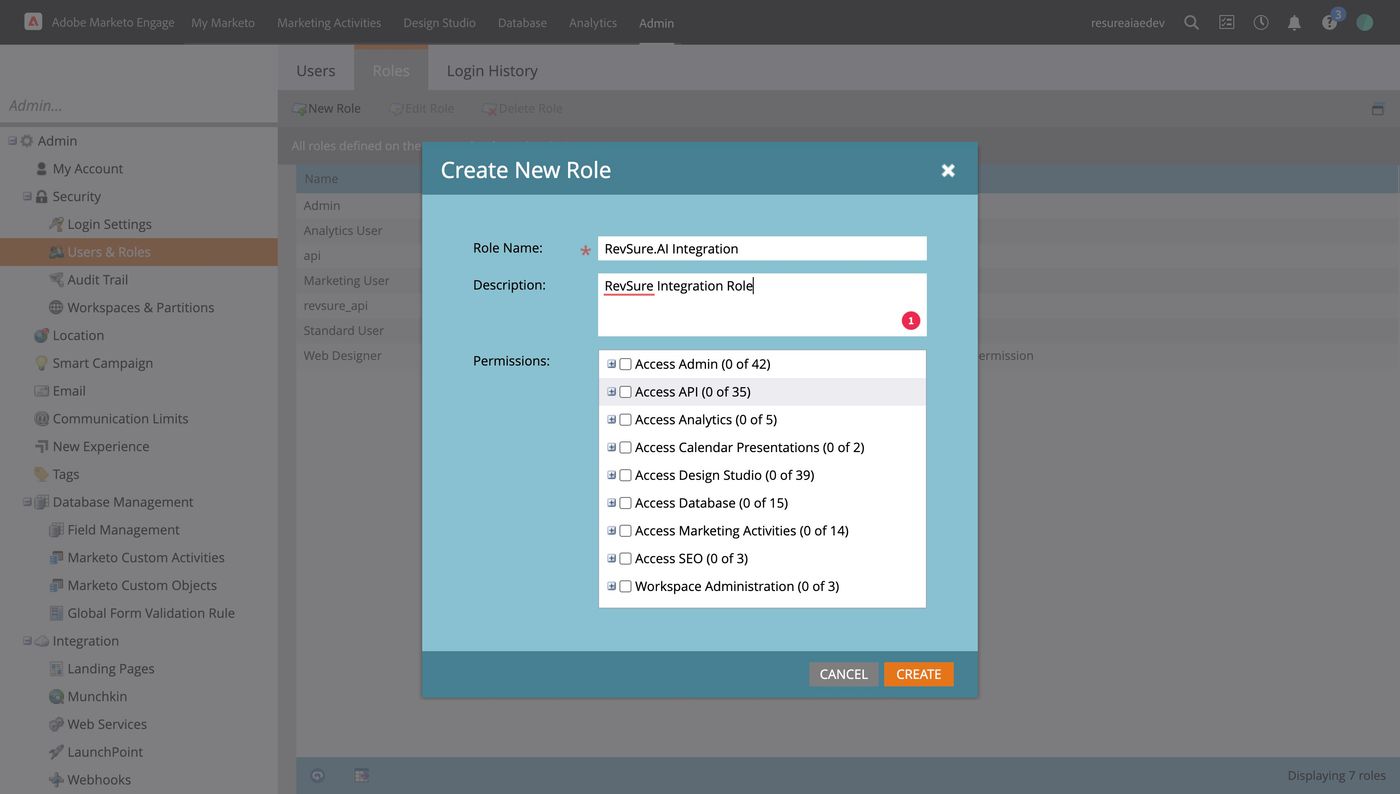
10. Click the "Description:" field.

RevSure Marketo Integration Implementation Guide (figure 8)

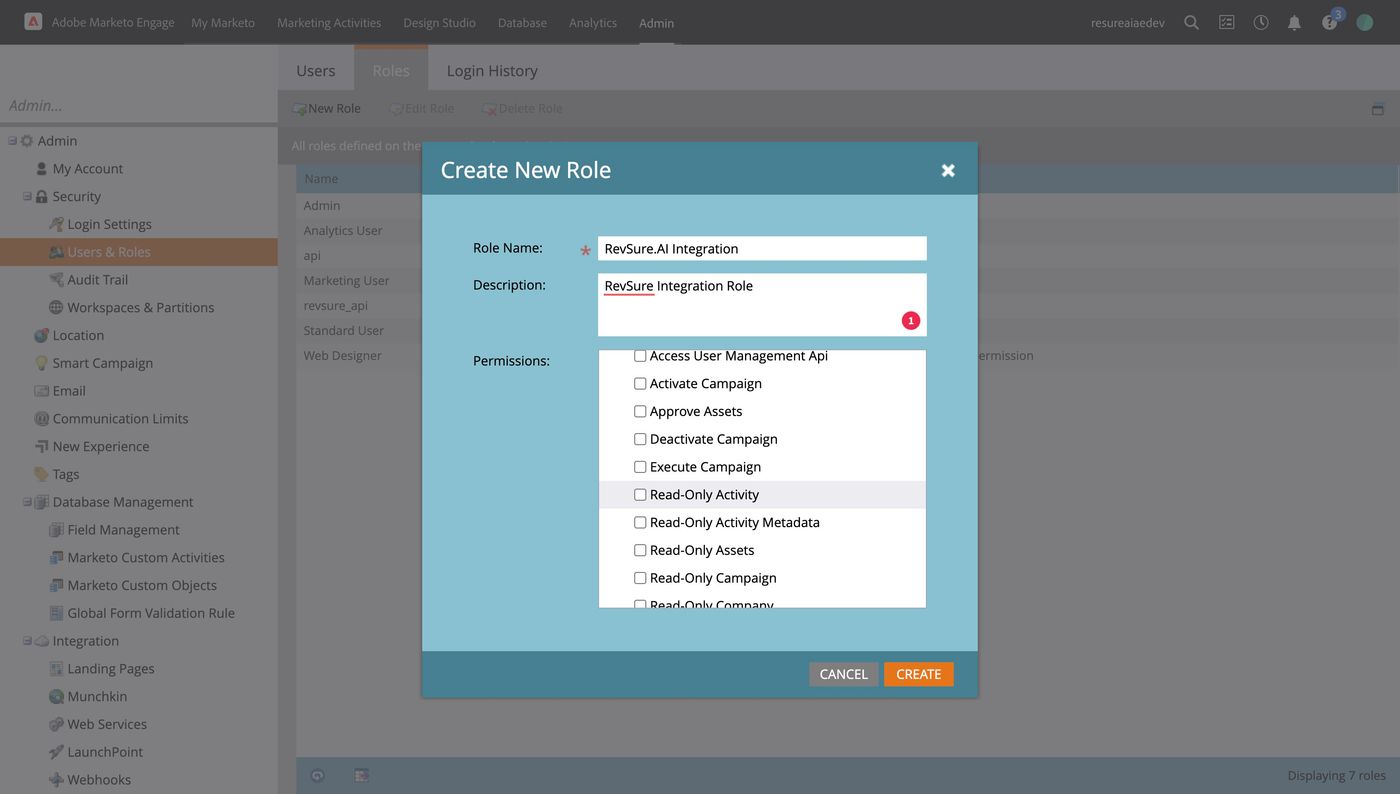
11. Expand Access API

RevSure Marketo Integration Implementation Guide (figure 9)

12. Select Read-Only Activity

RevSure Marketo Integration Implementation Guide (figure 10)

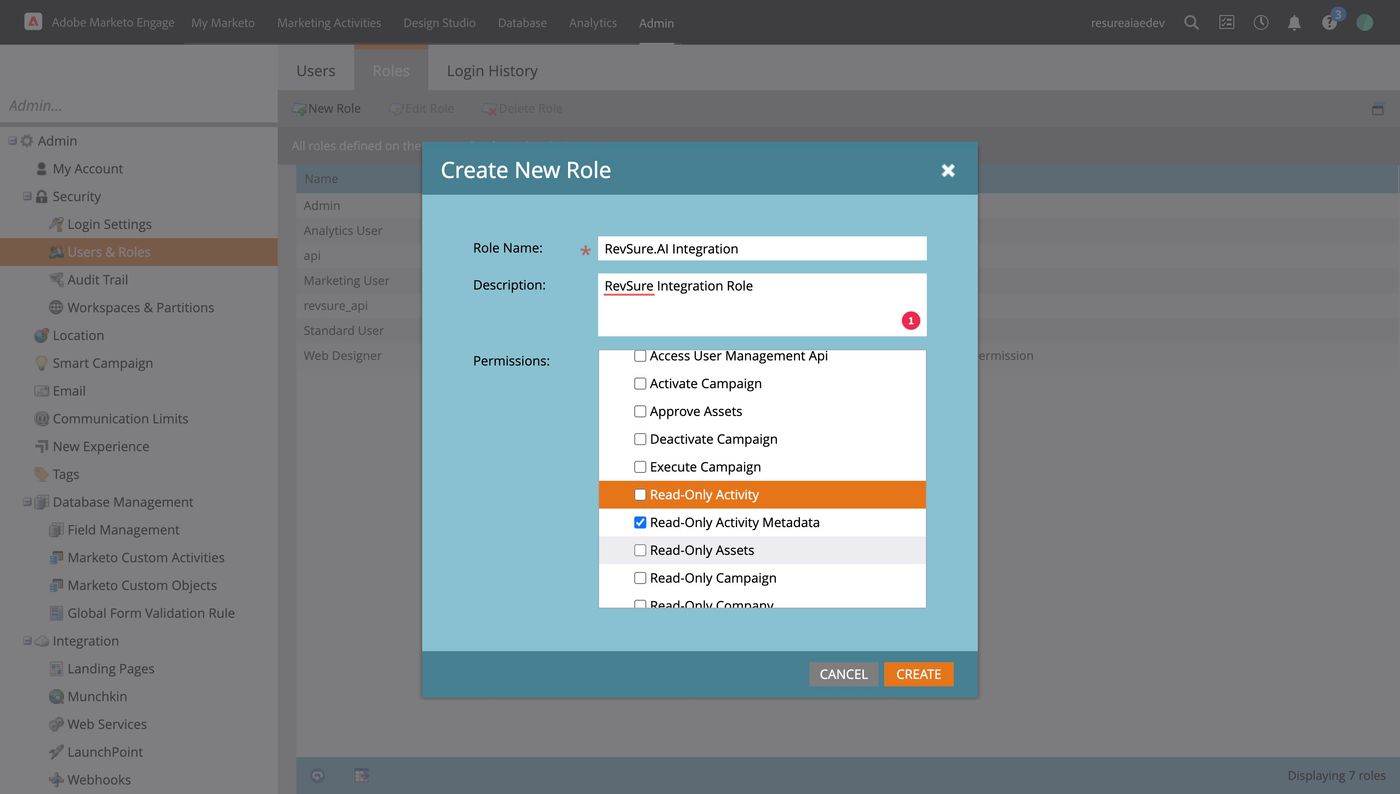
13. Select Read-Only Activity Metadata
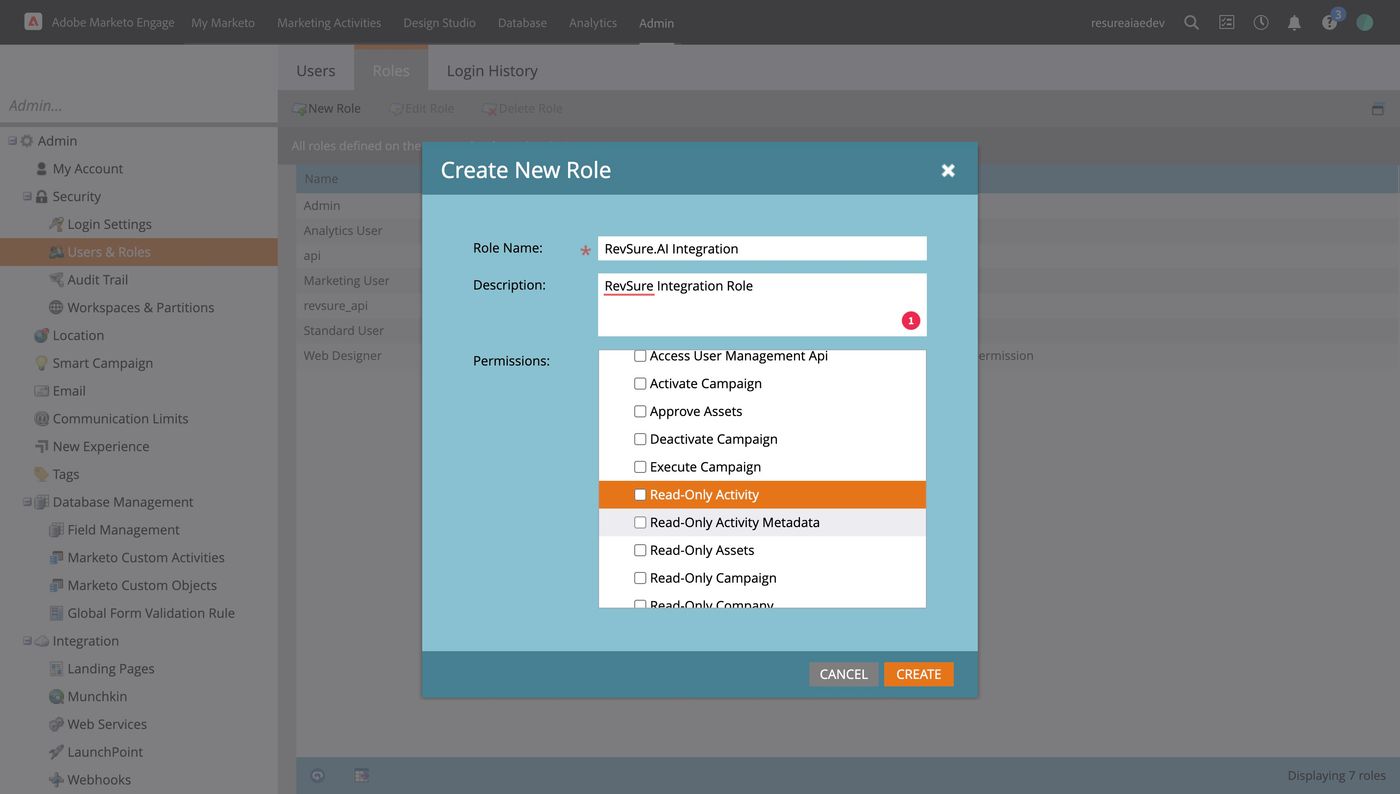
RevSure Marketo Integration Implementation Guide (figure 11)

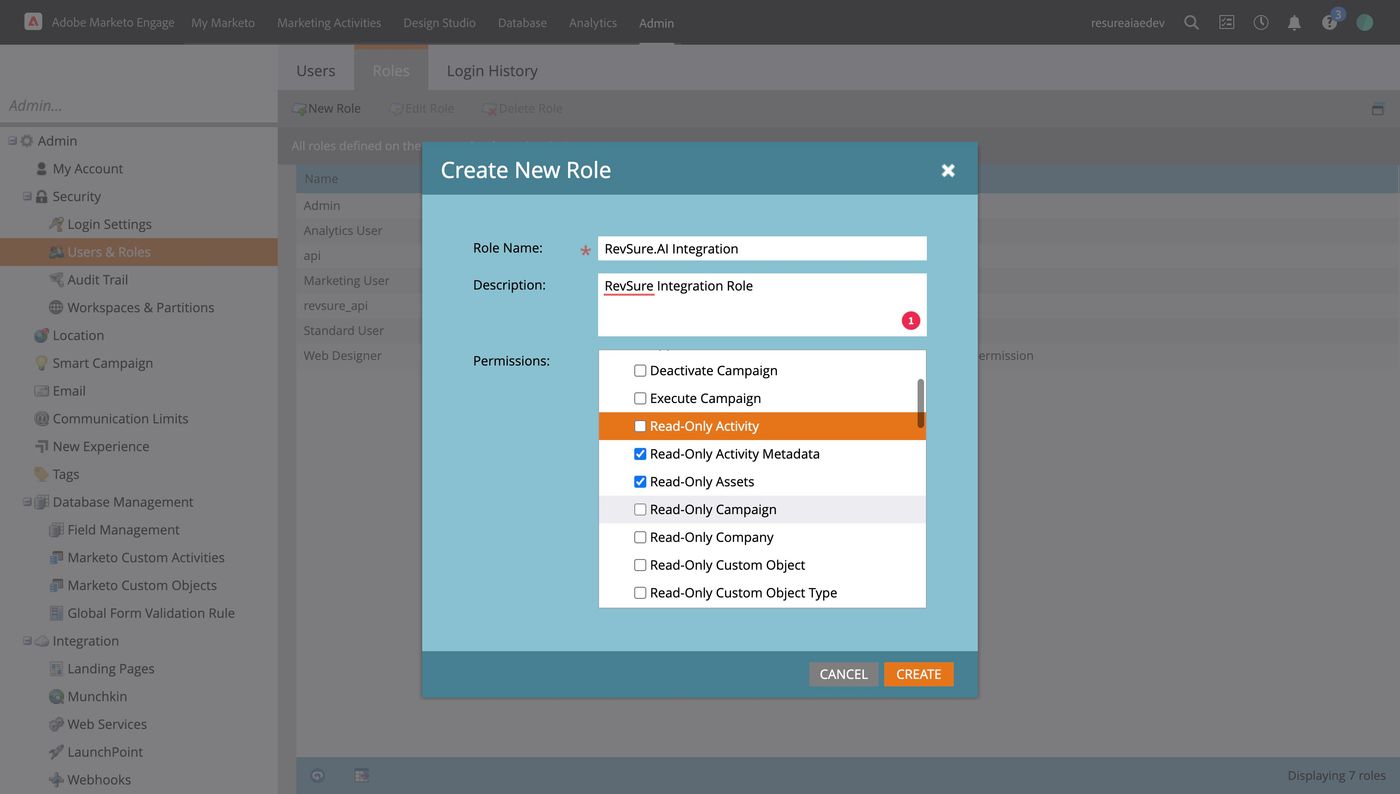
14. Select Read-Only Assets

RevSure Marketo Integration Implementation Guide (figure 12)

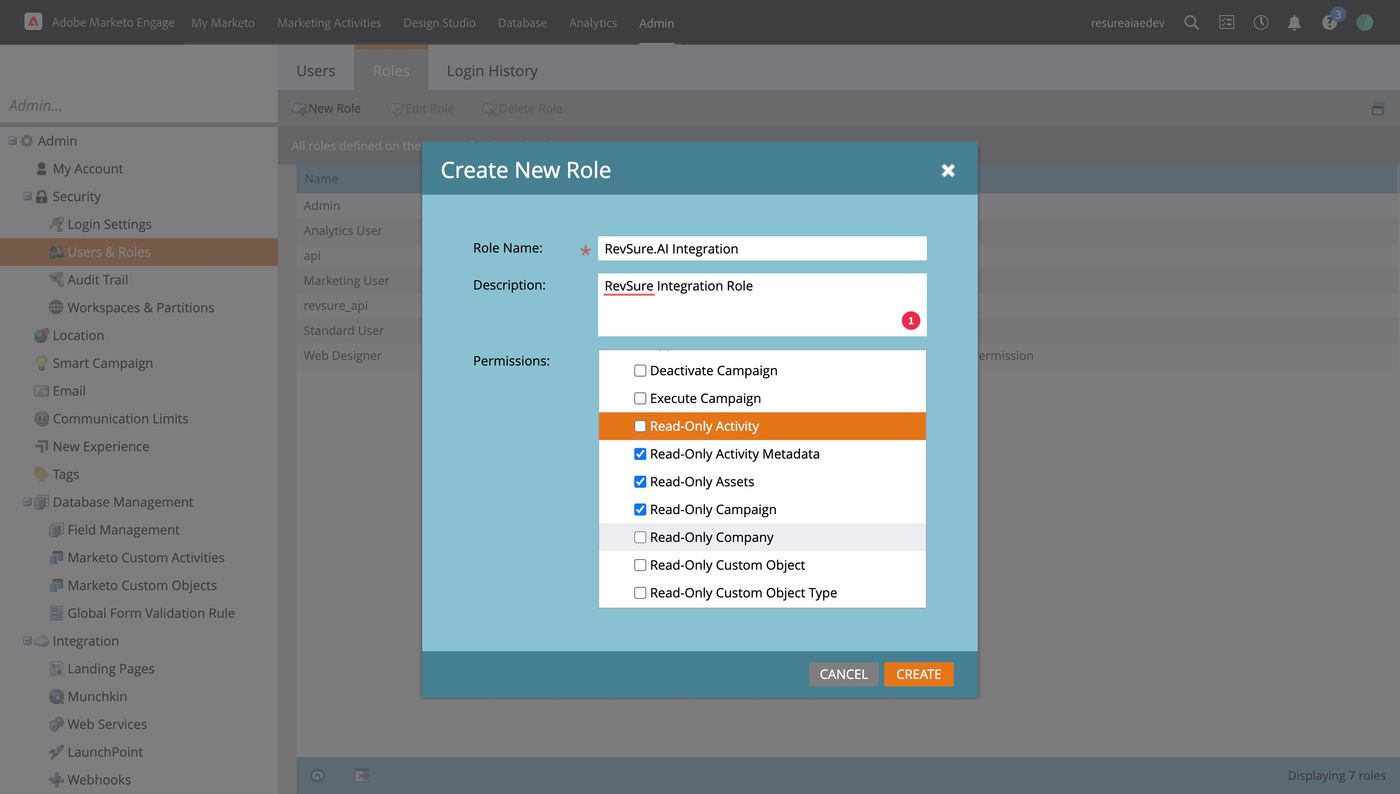
15. Select Read-Only Campaign

RevSure Marketo Integration Implementation Guide (figure 13)

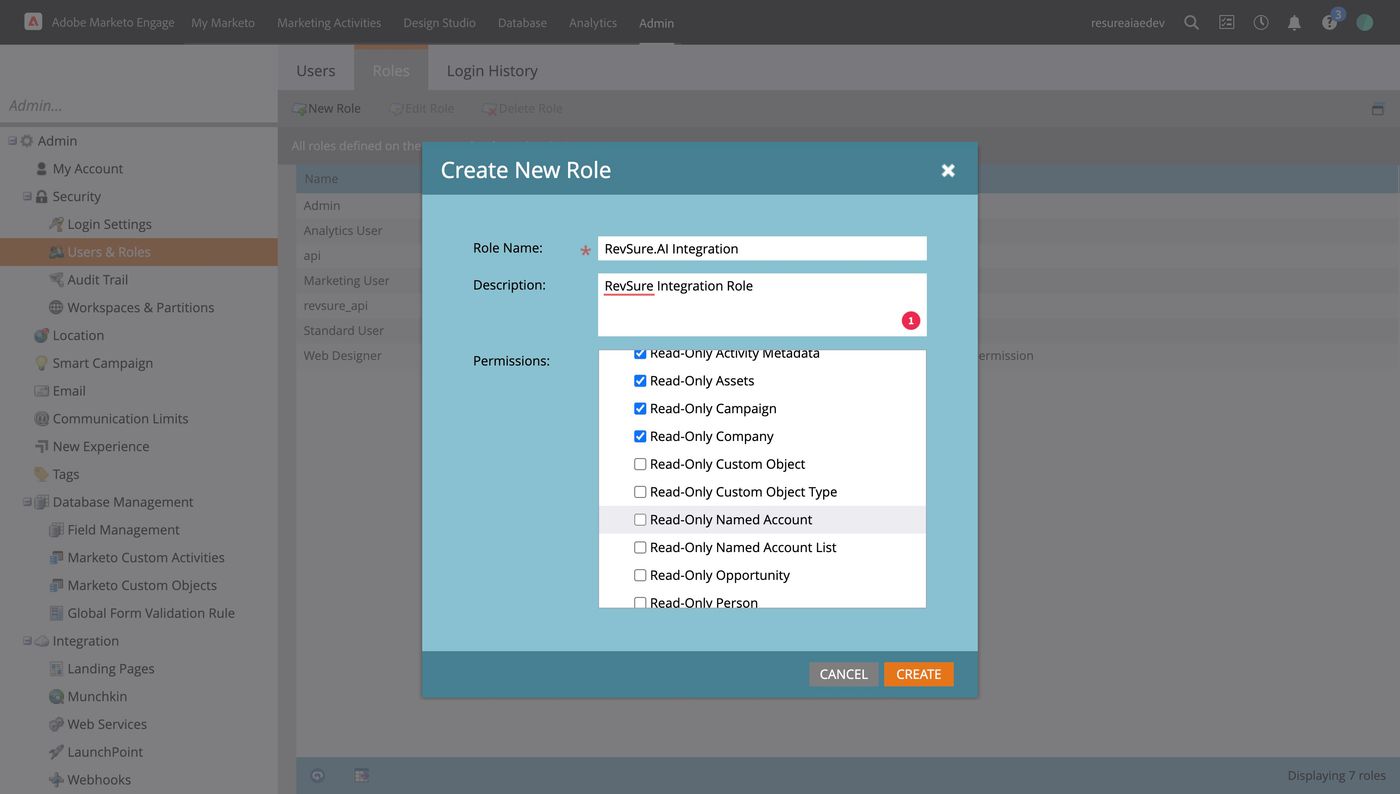
16. Select Read-Only Company

RevSure Marketo Integration Implementation Guide (figure 14)

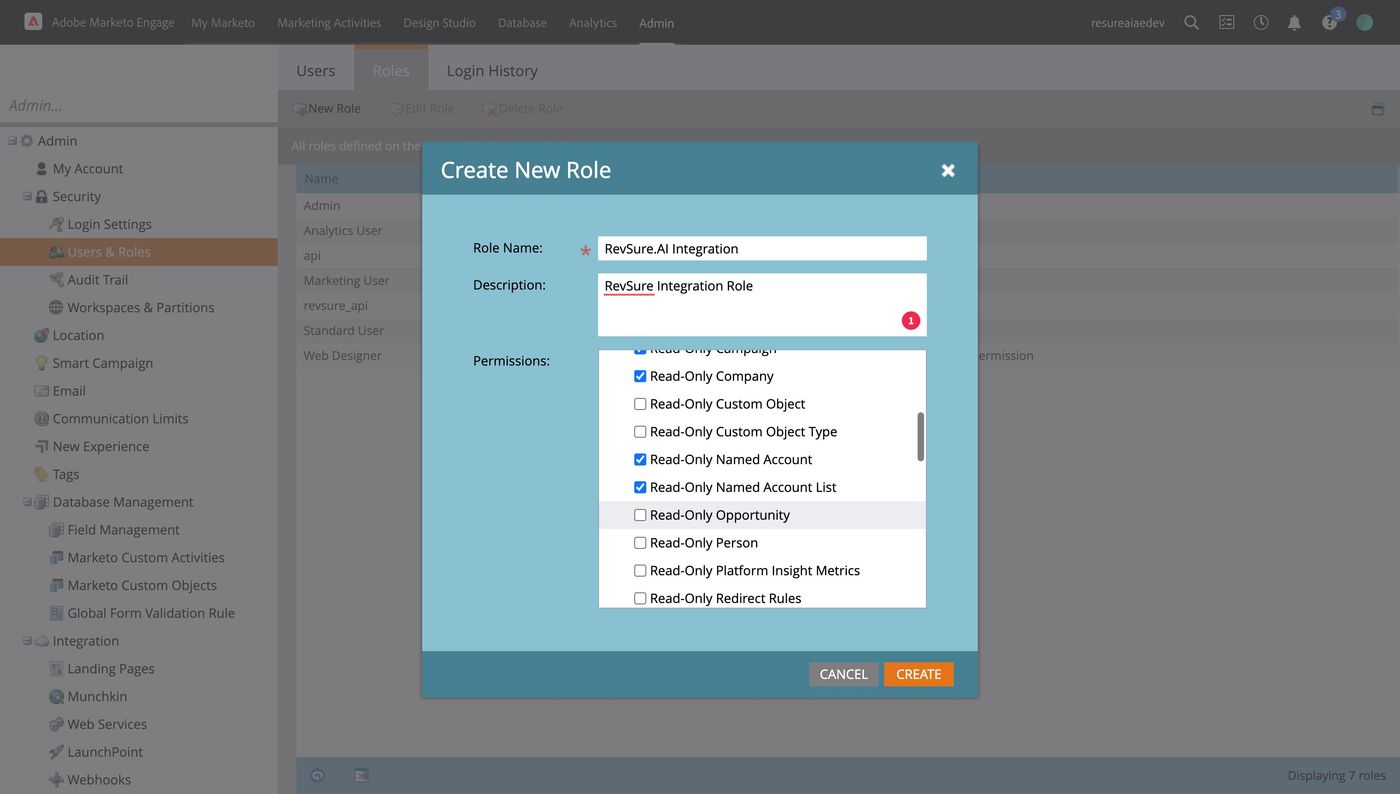
17. Select Read-Only Named Account

RevSure Marketo Integration Implementation Guide (figure 15)

18. Select Read-Only Named Account List
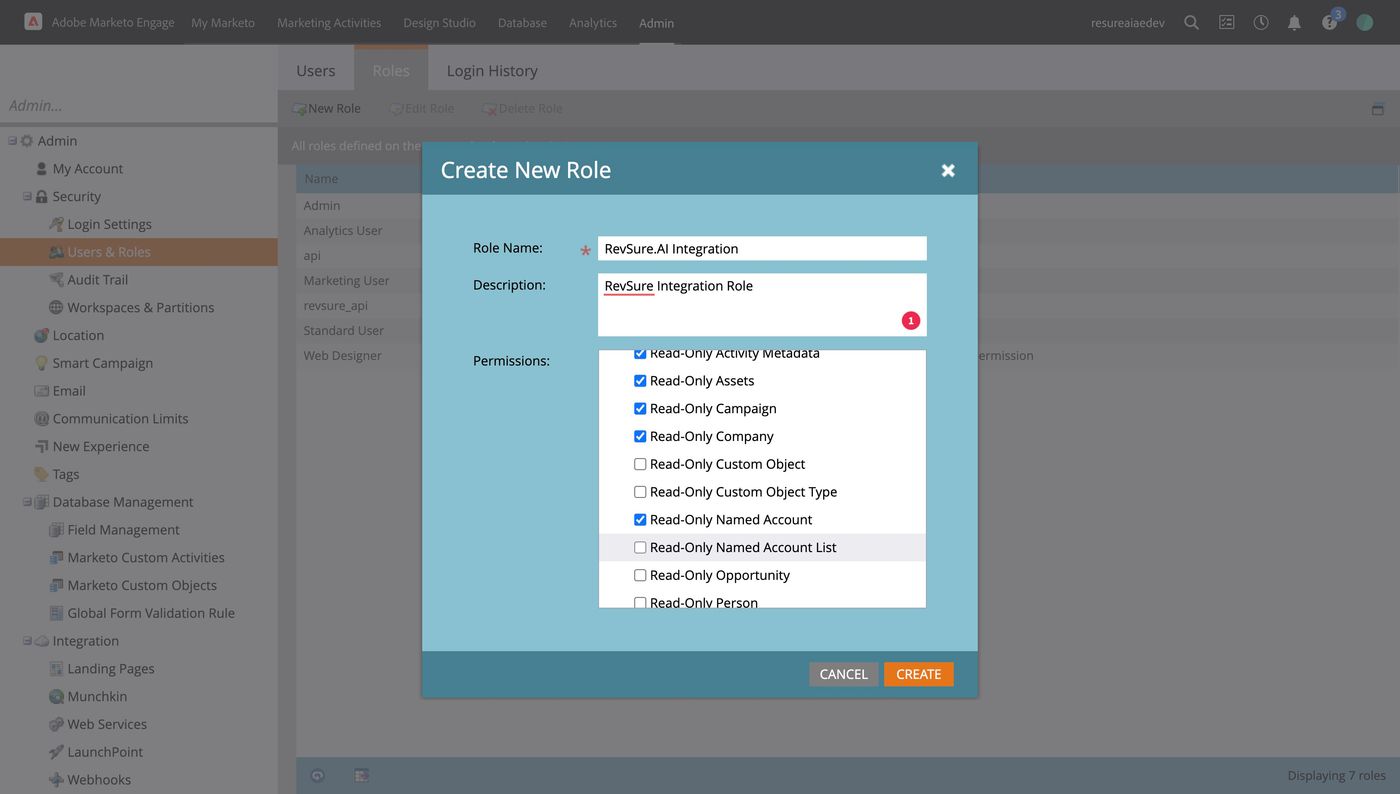
RevSure Marketo Integration Implementation Guide (figure 16)

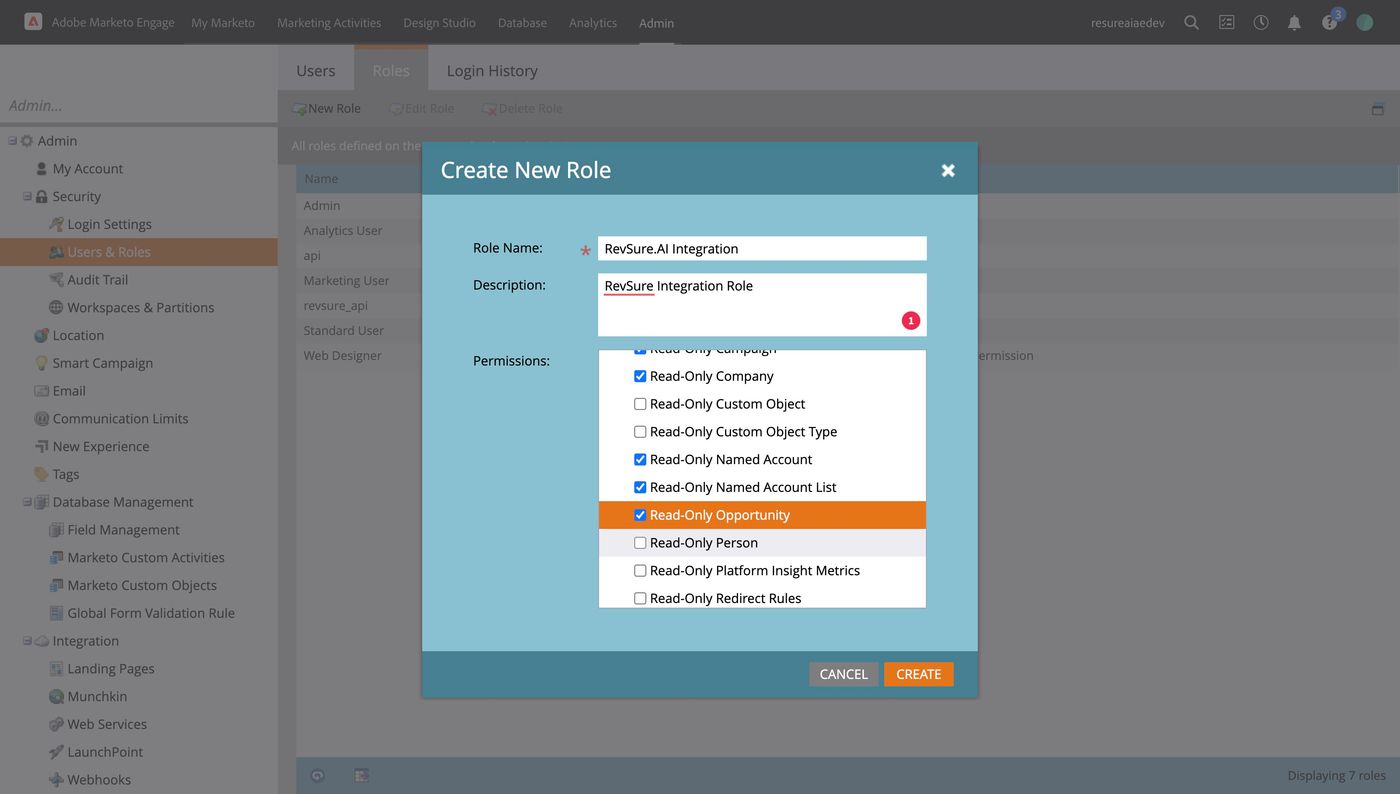
19. Select Read-Only Opportunity

RevSure Marketo Integration Implementation Guide (figure 17)

20. Select Read-Only Person

RevSure Marketo Integration Implementation Guide (figure 18)

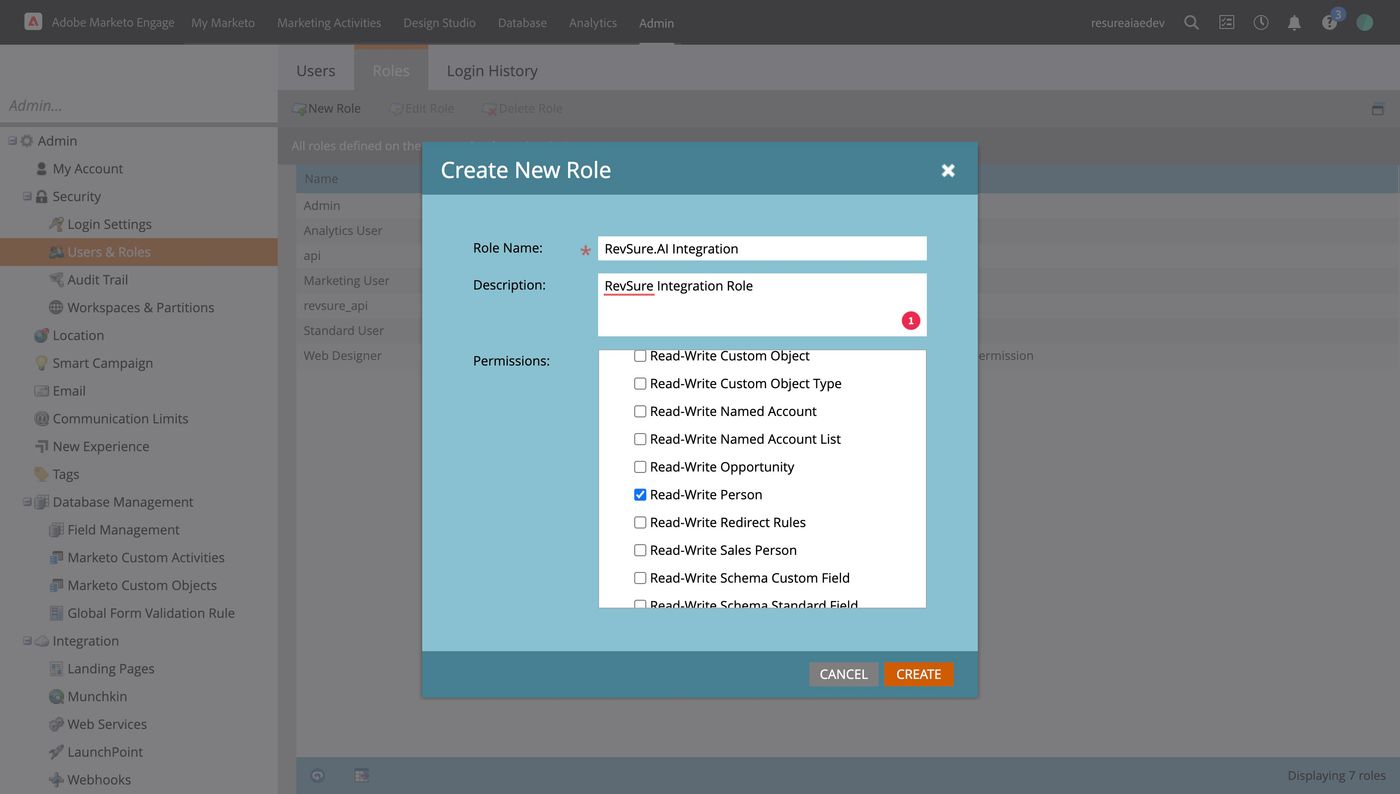
21. Select Read-Write Person (This is needed for write back)
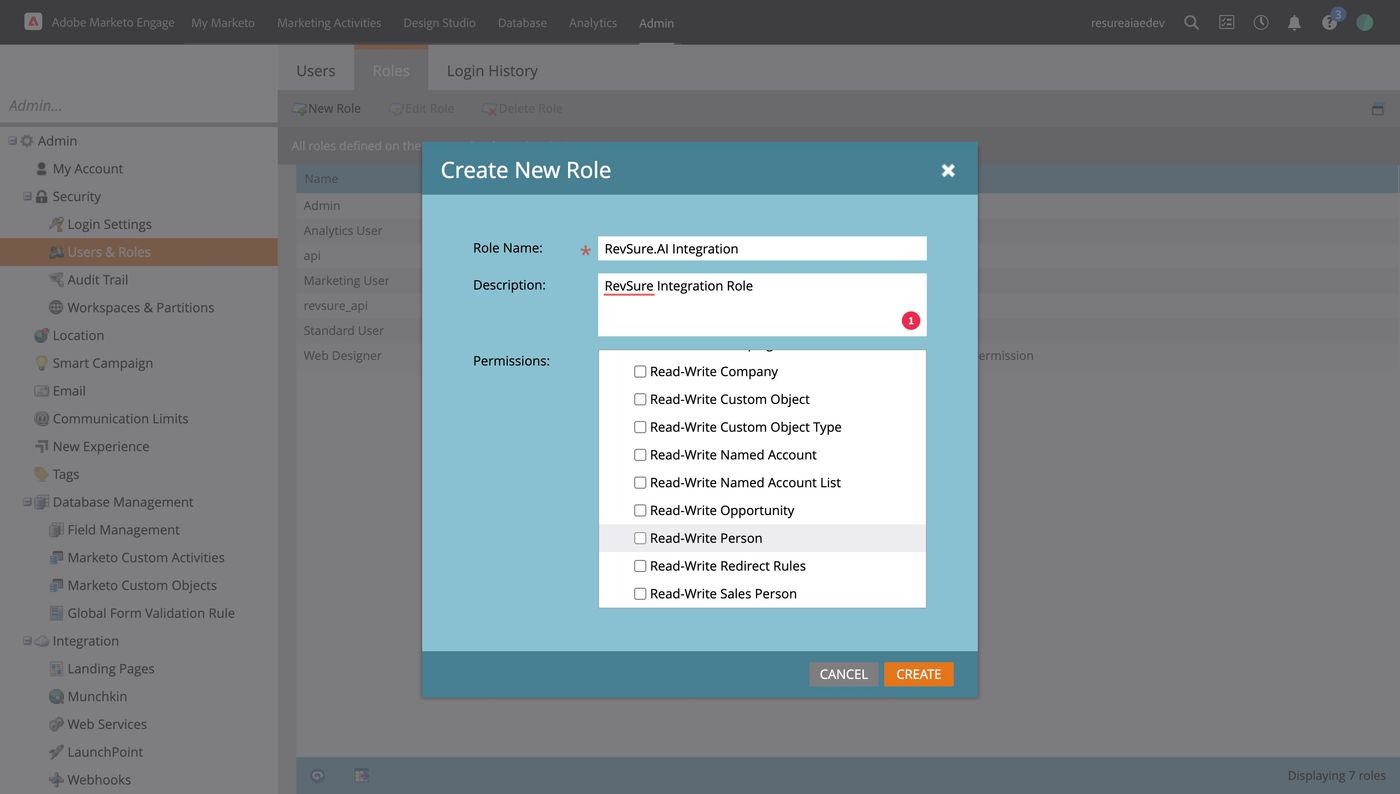
RevSure Marketo Integration Implementation Guide (figure 19)

22. Click "CREATE"

RevSure Marketo Integration Implementation Guide (figure 20)

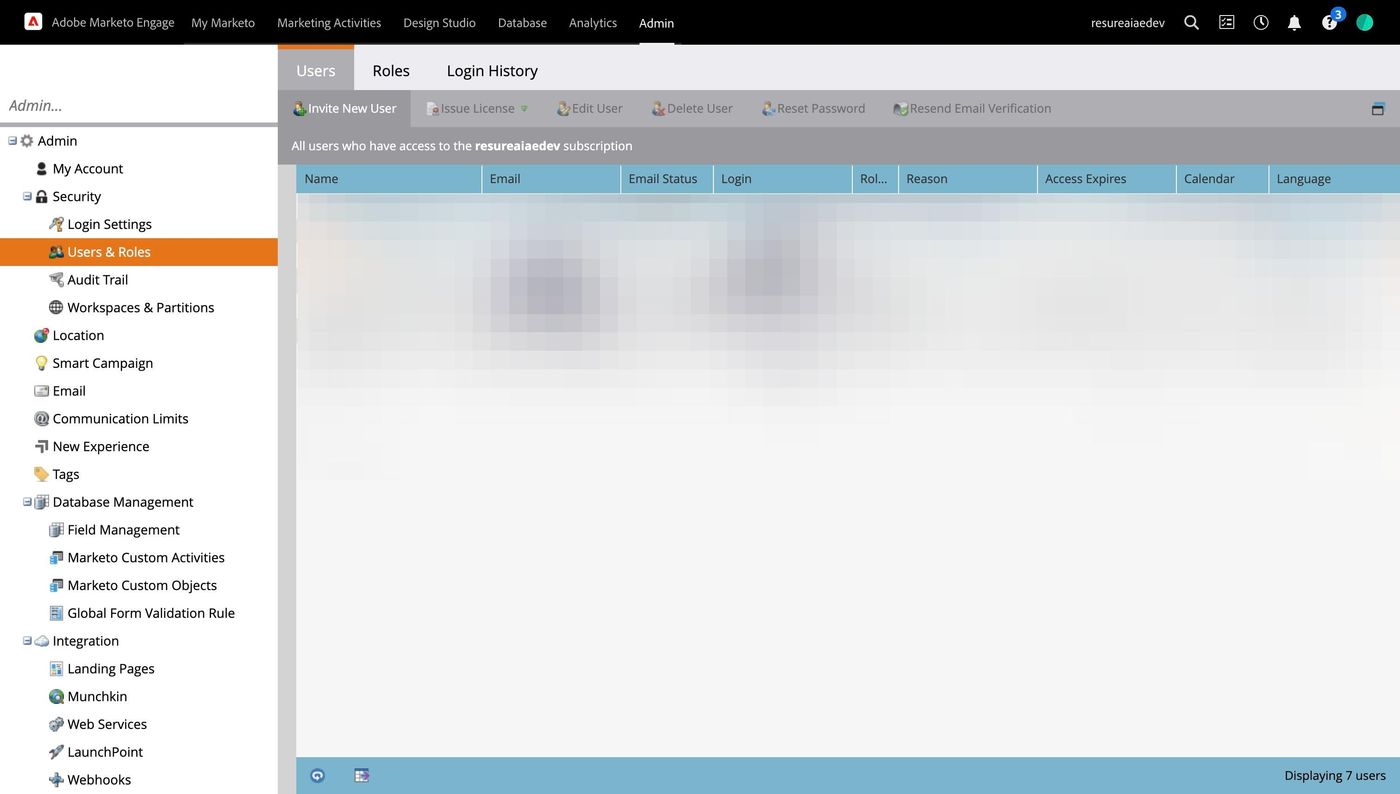
23. Click "Users"

RevSure Marketo Integration Implementation Guide (figure 21)

24. Click "Invite New User"

RevSure Marketo Integration Implementation Guide (figure 22)

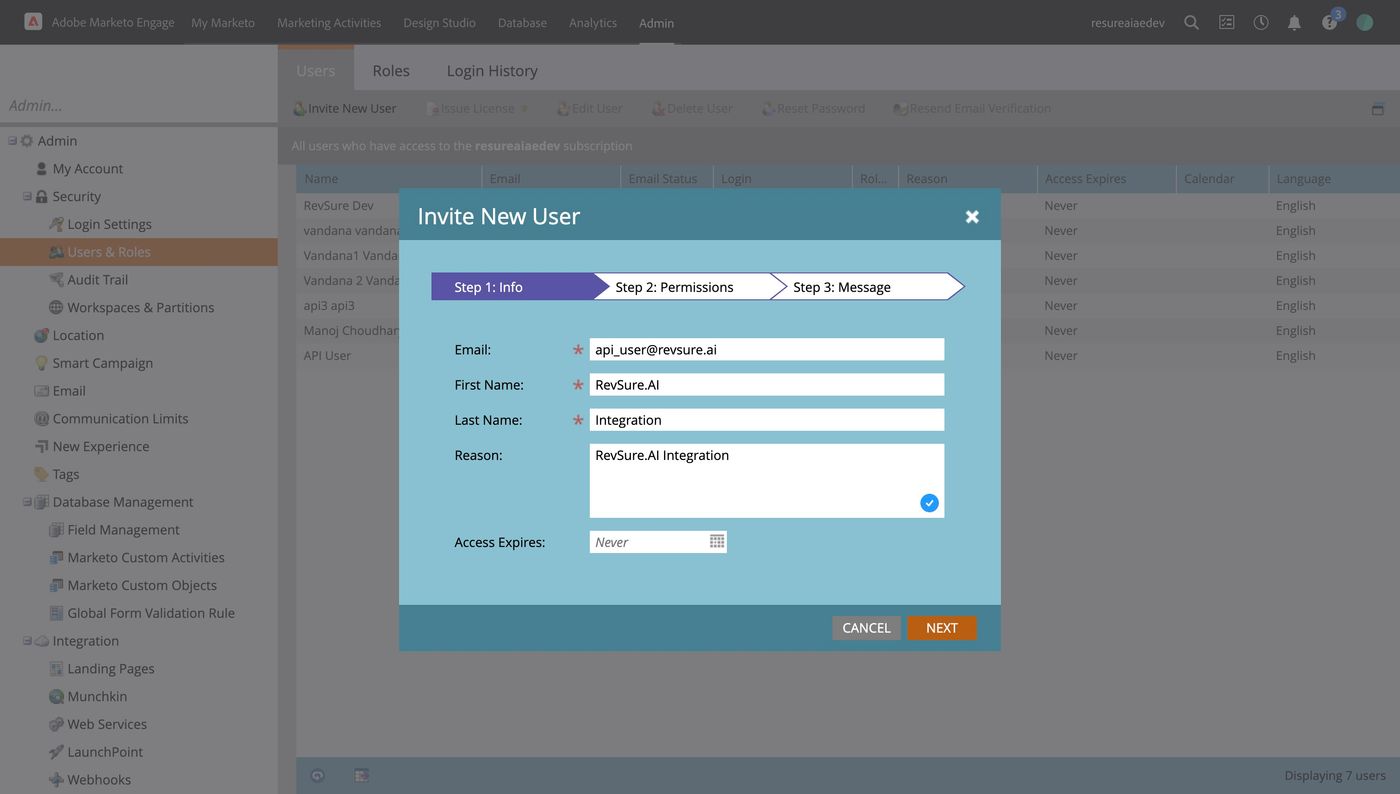
25. Please add the Email, First Name, Last Name and Reason
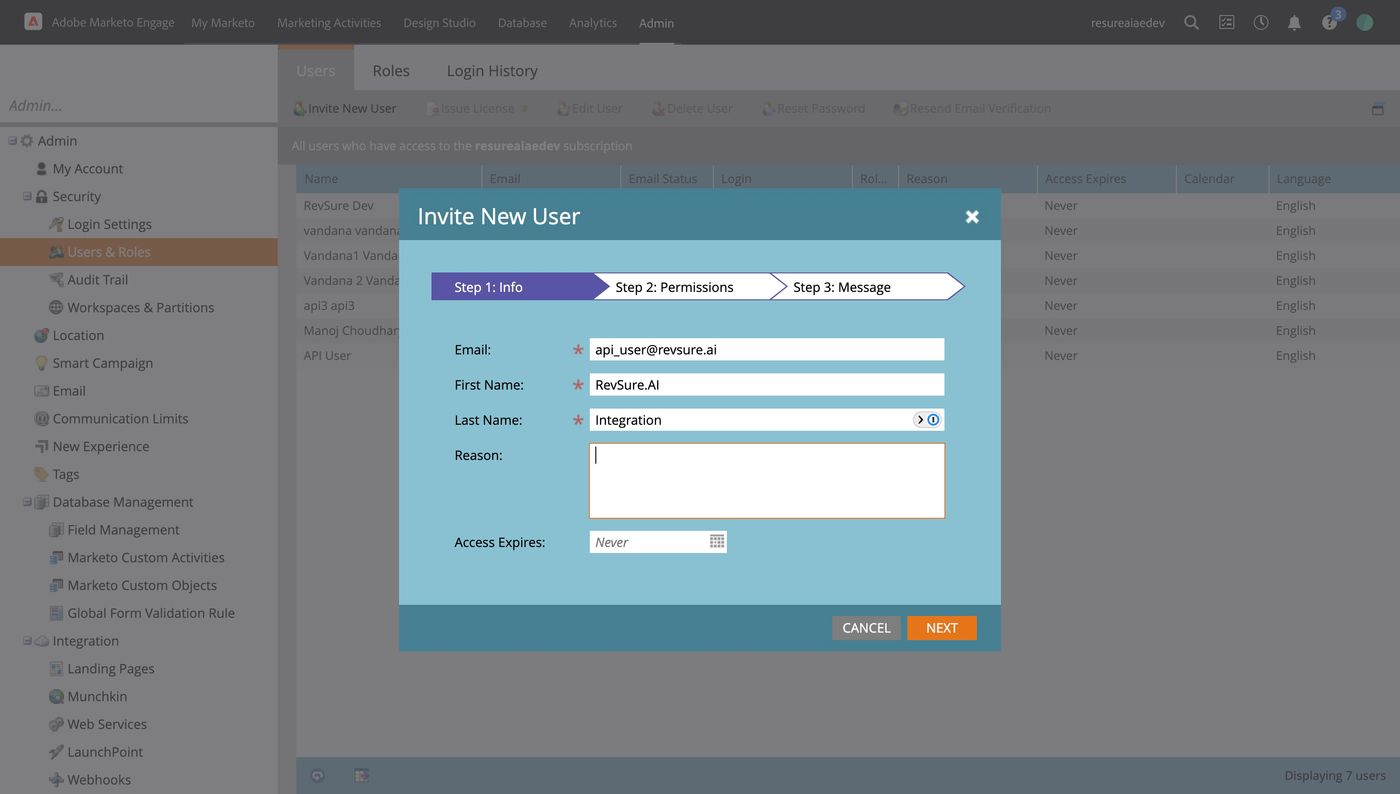
RevSure Marketo Integration Implementation Guide (figure 23)

26. Click "NEXT"

RevSure Marketo Integration Implementation Guide (figure 24)

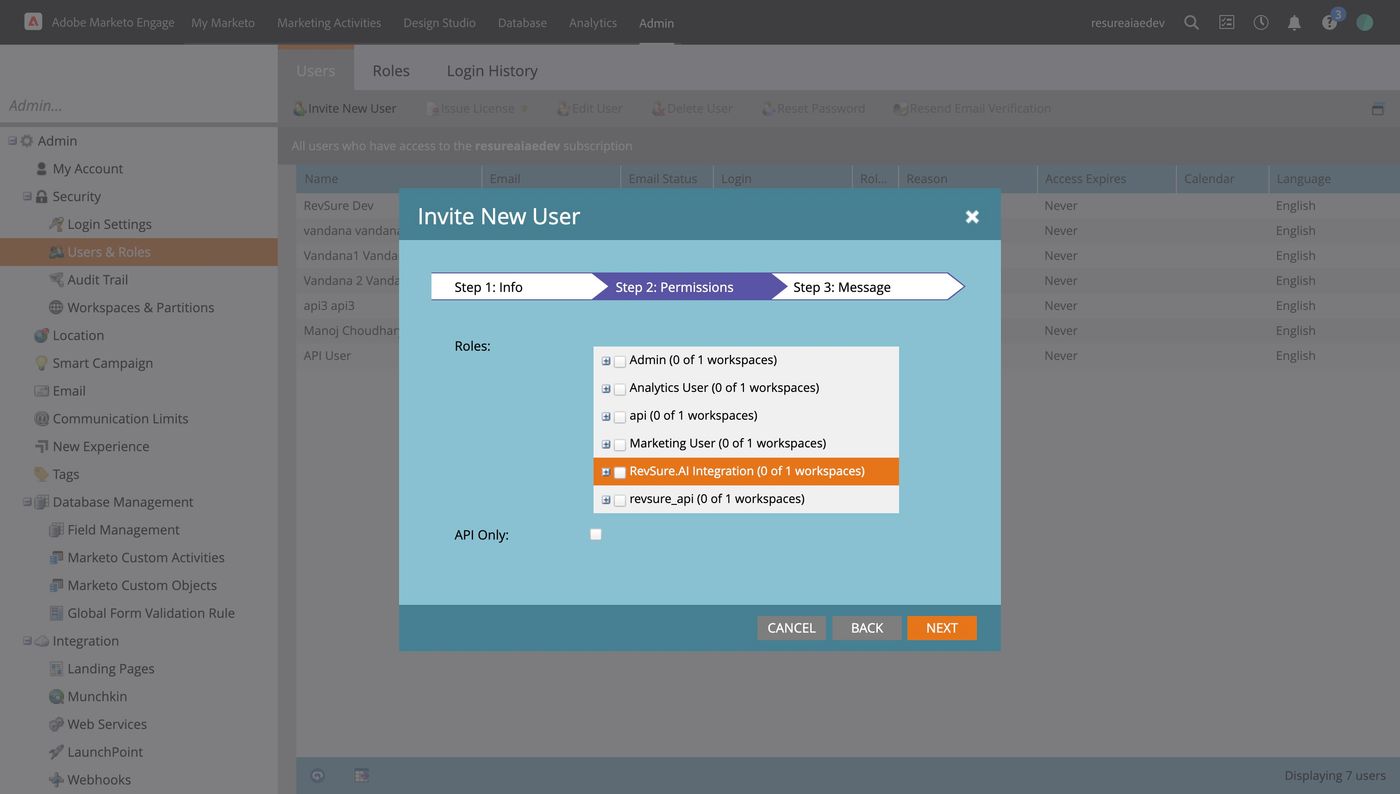
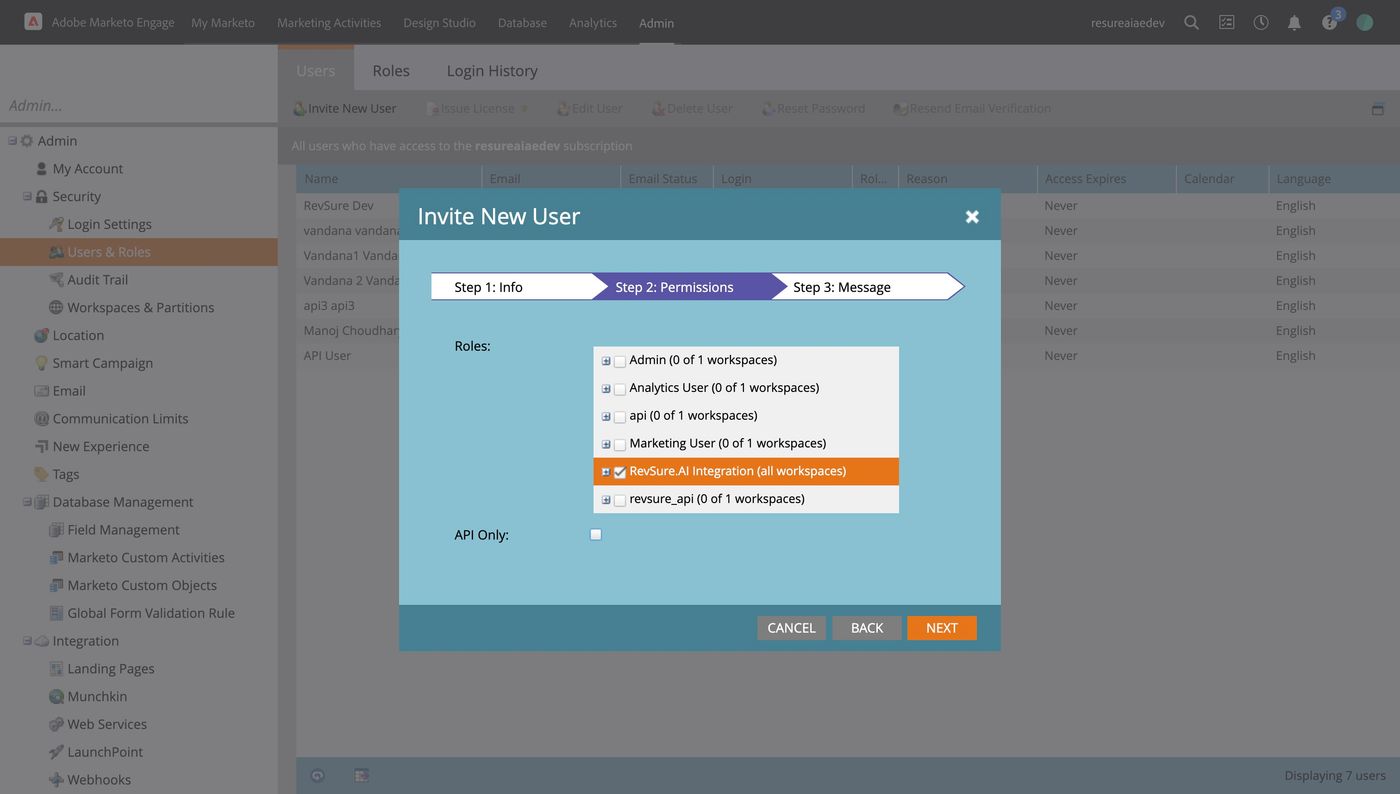
27. Select the Role created

RevSure Marketo Integration Implementation Guide (figure 25)

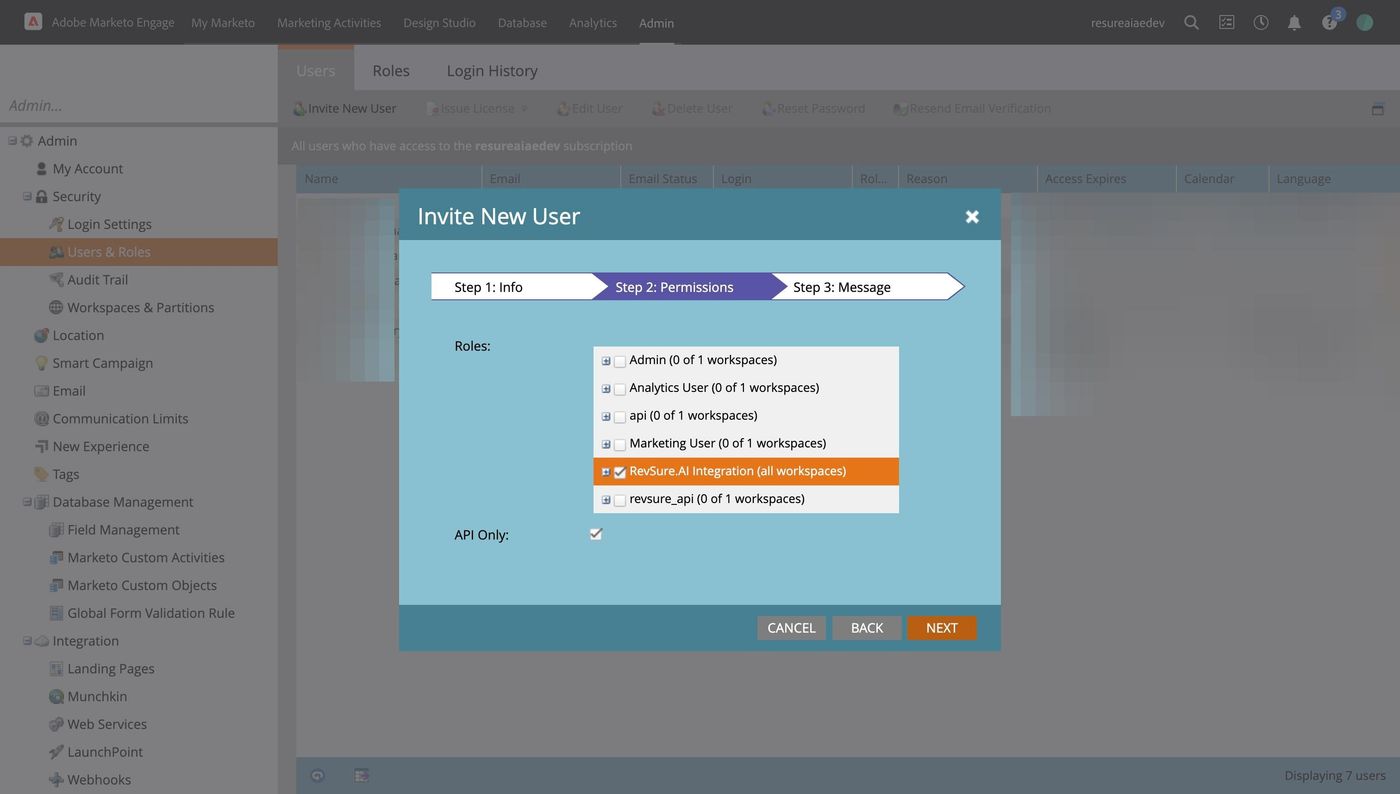
28. Enabled API Only

RevSure Marketo Integration Implementation Guide (figure 26)

29. Click "NEXT"

RevSure Marketo Integration Implementation Guide (figure 27)

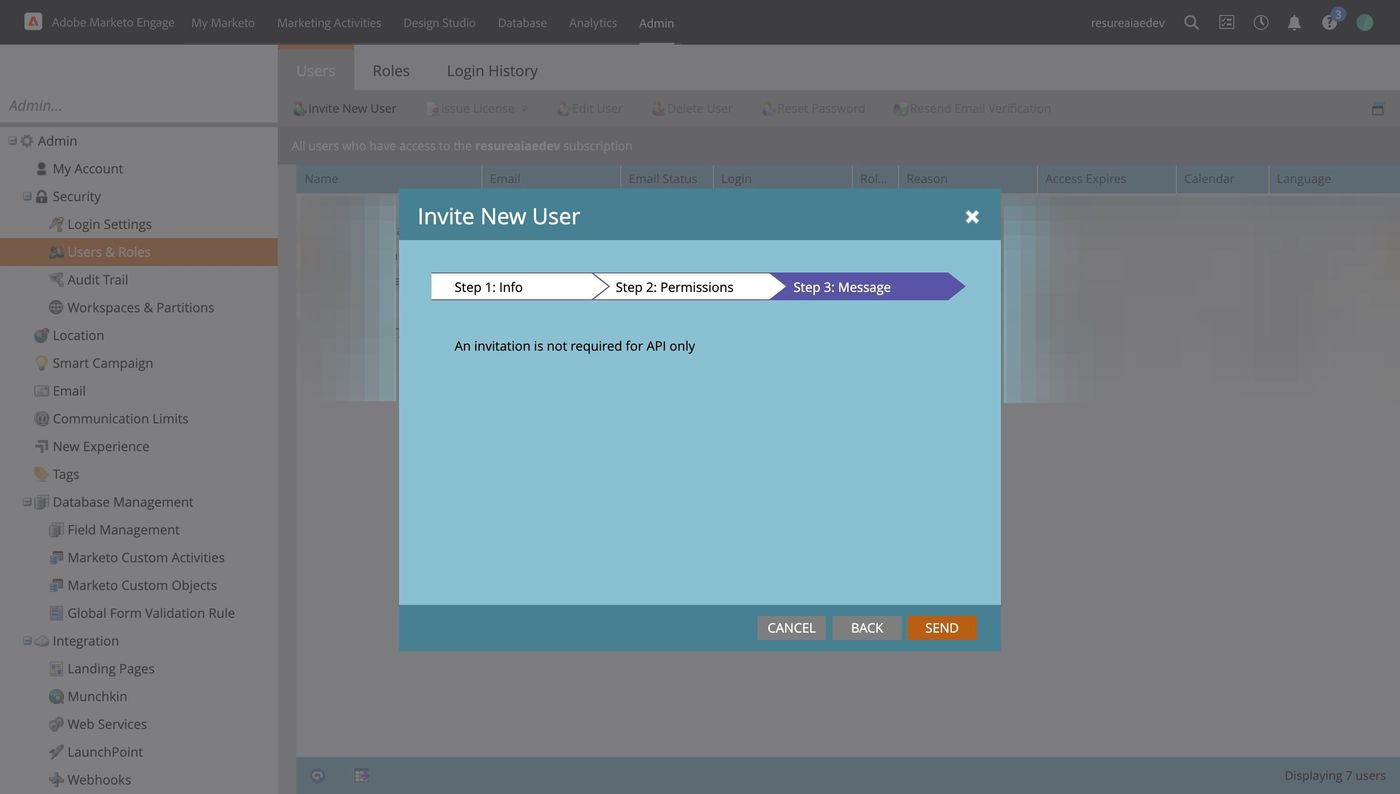
30. Click "SEND"

RevSure Marketo Integration Implementation Guide (figure 28)

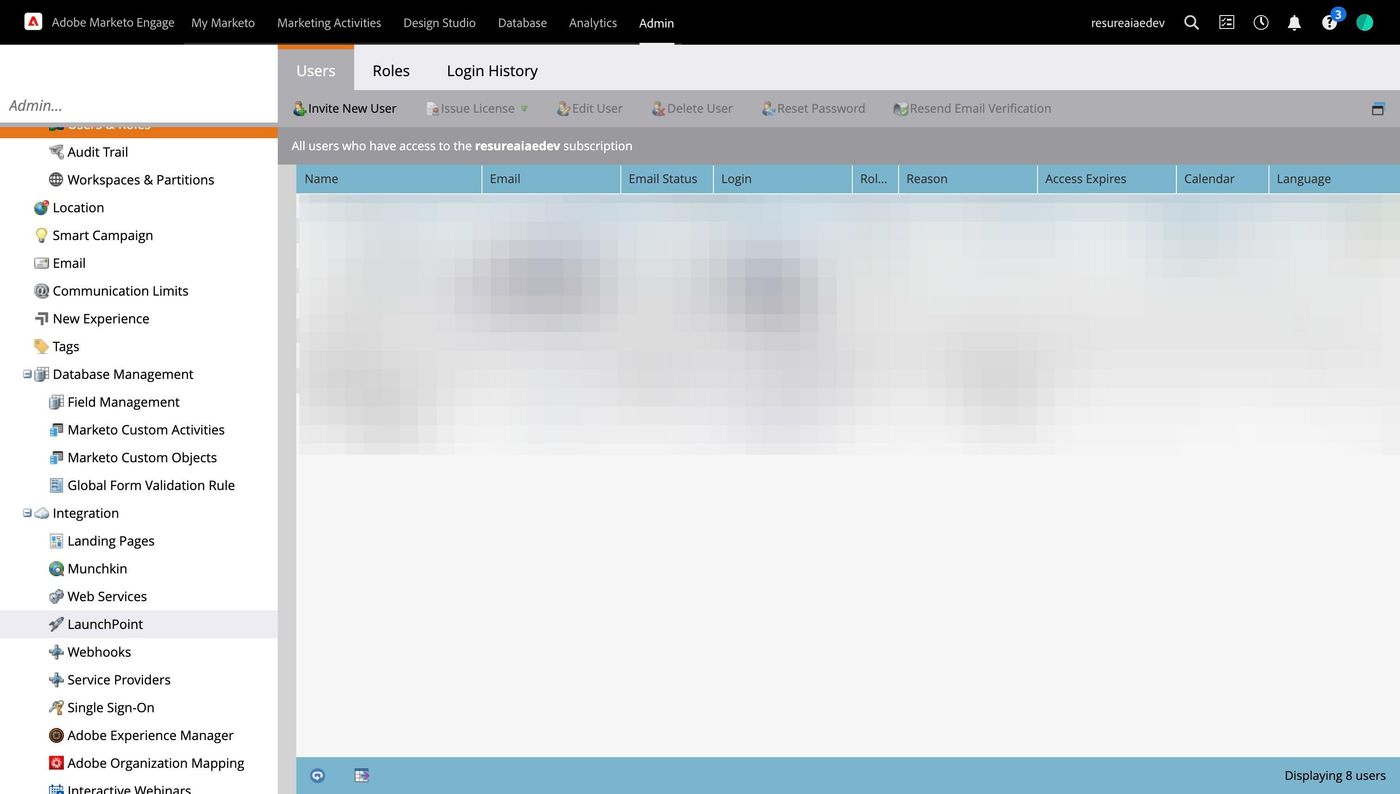
31. Click "LaunchPoint"

RevSure Marketo Integration Implementation Guide (figure 29)

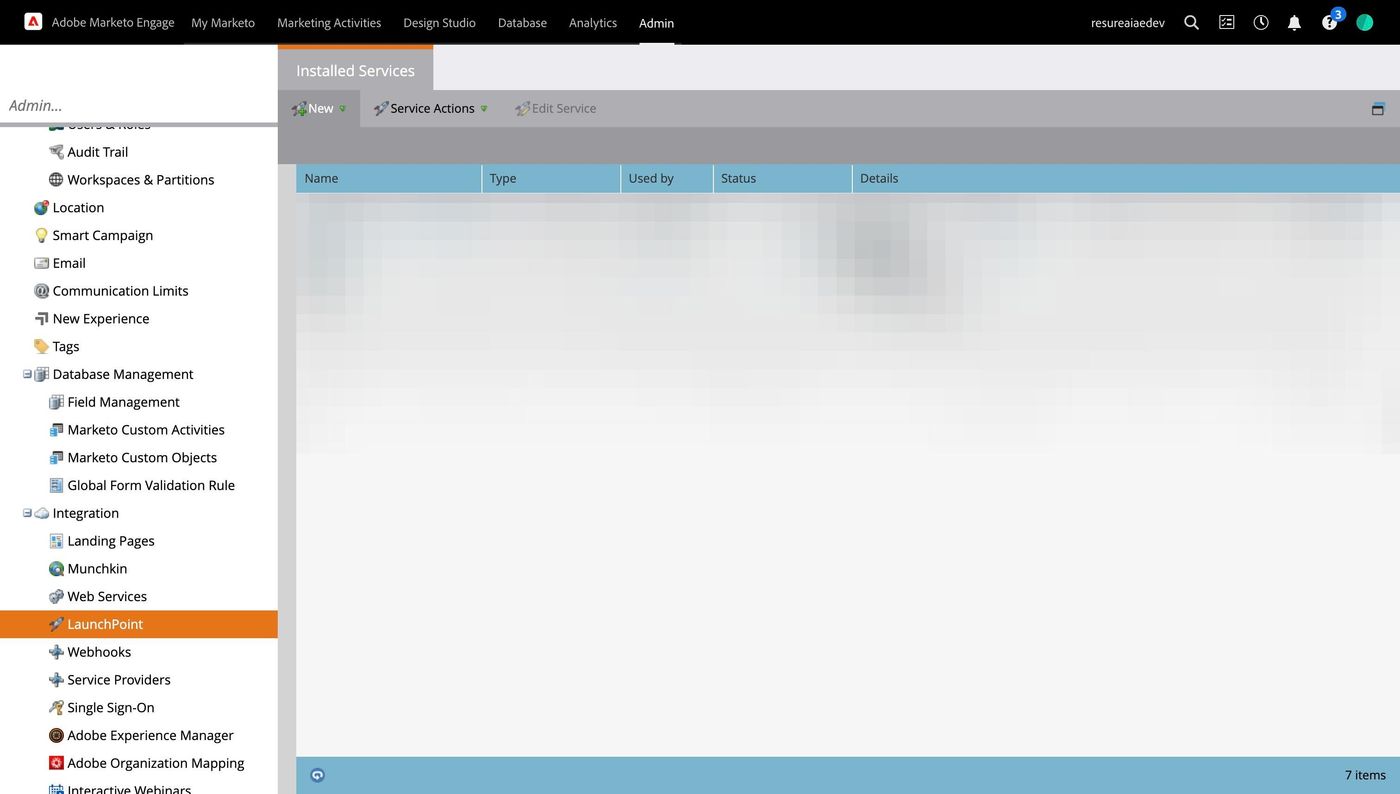
32. Click "New"

RevSure Marketo Integration Implementation Guide (figure 30)

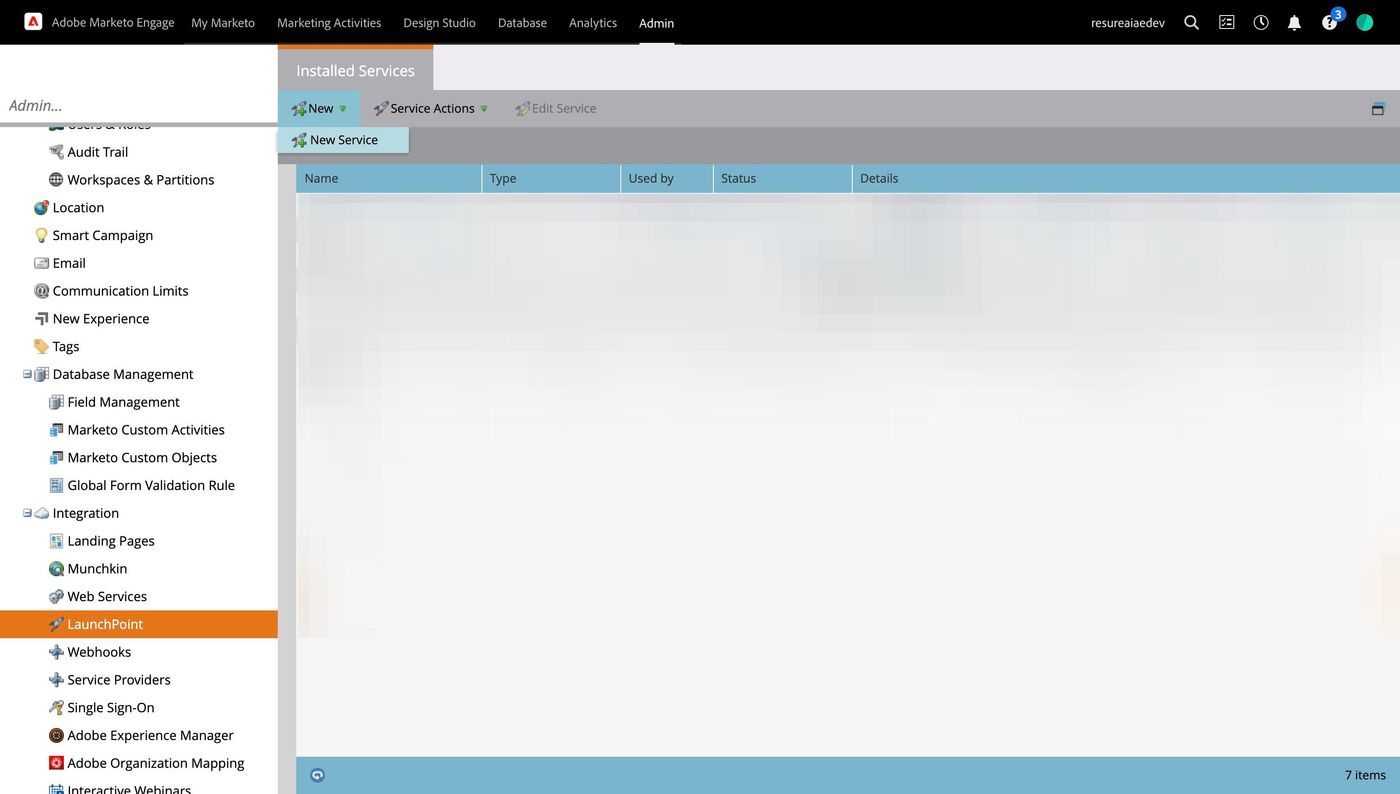
33. Click "New Service"

RevSure Marketo Integration Implementation Guide (figure 31)

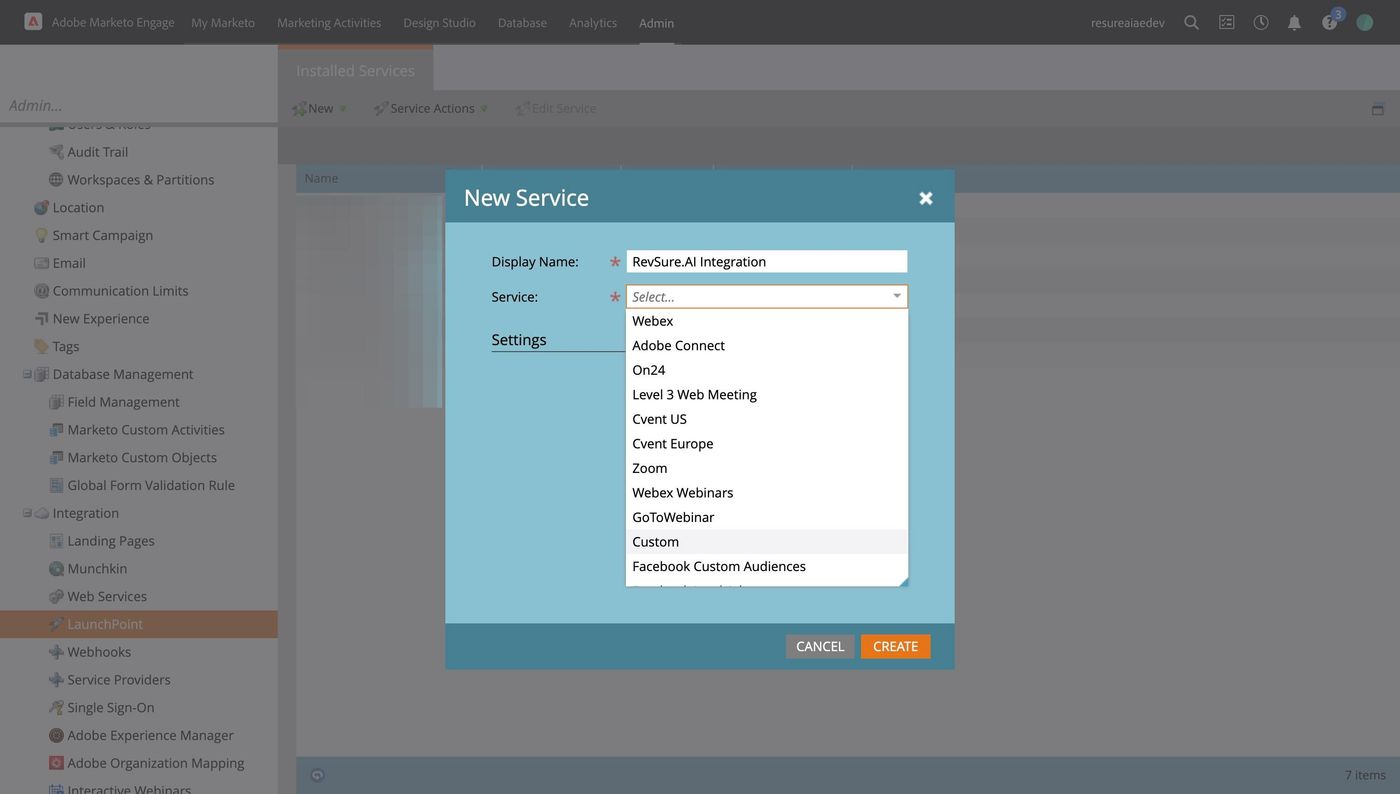
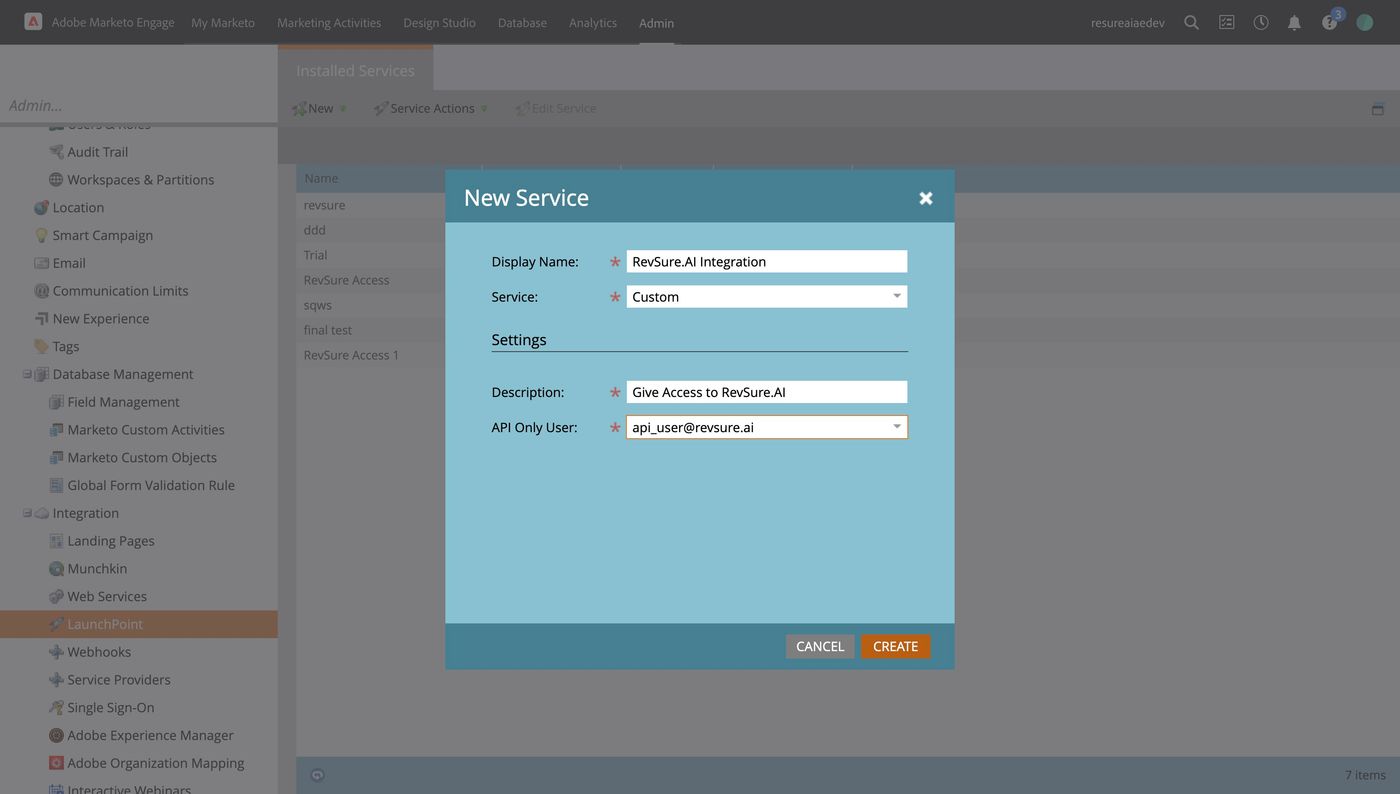
34. Enter Display Name and Click on Service
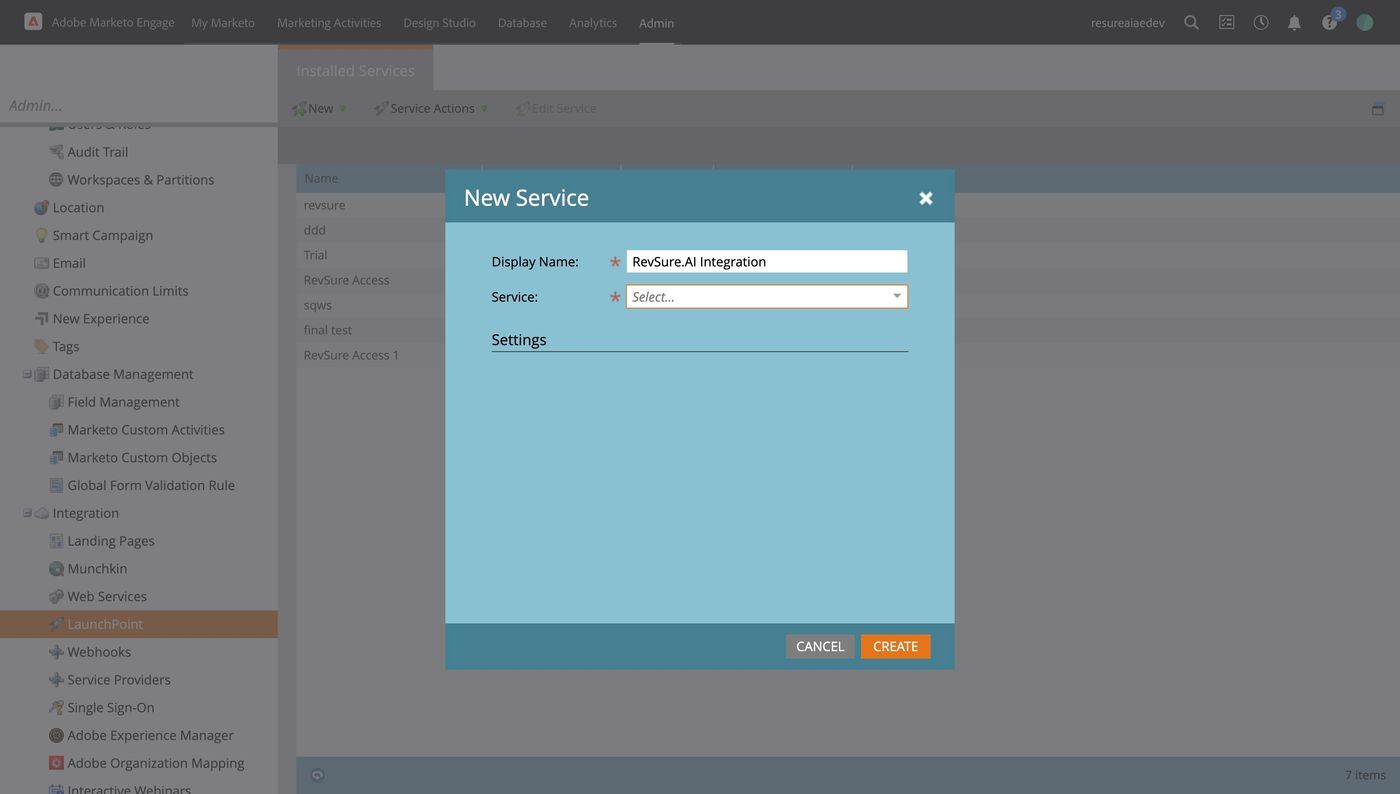
RevSure Marketo Integration Implementation Guide (figure 32)

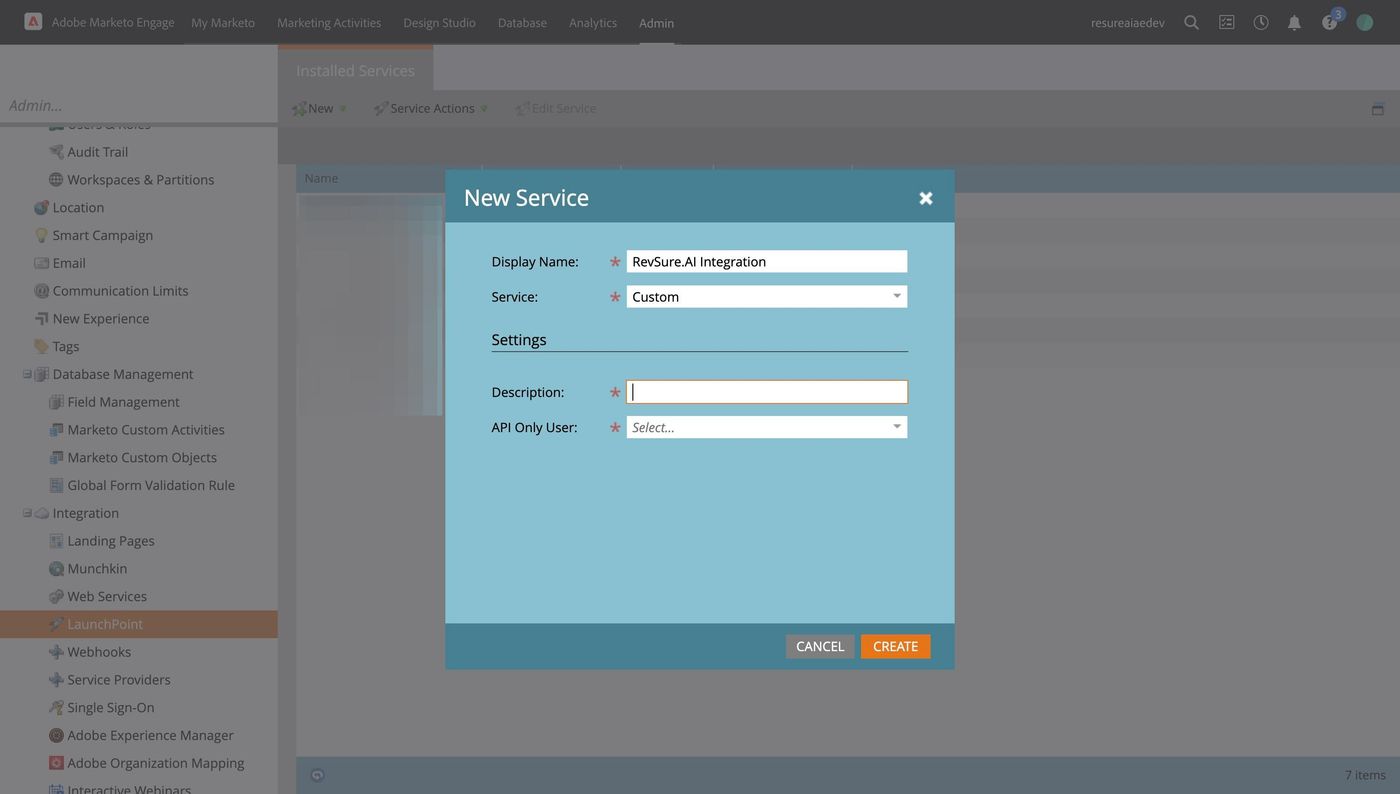
35. Click "Custom"

RevSure Marketo Integration Implementation Guide (figure 33)

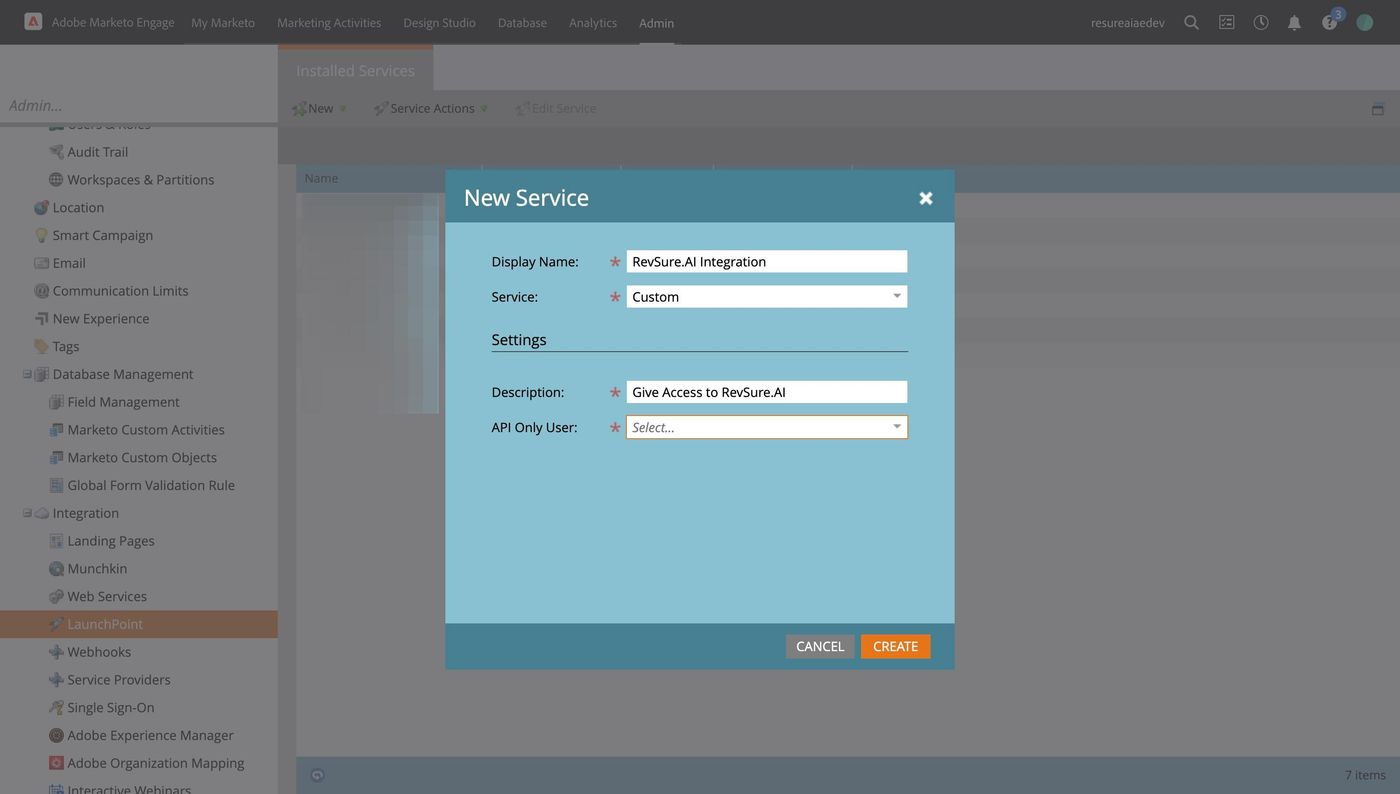
36. Click the "Description:" field

RevSure Marketo Integration Implementation Guide (figure 34)

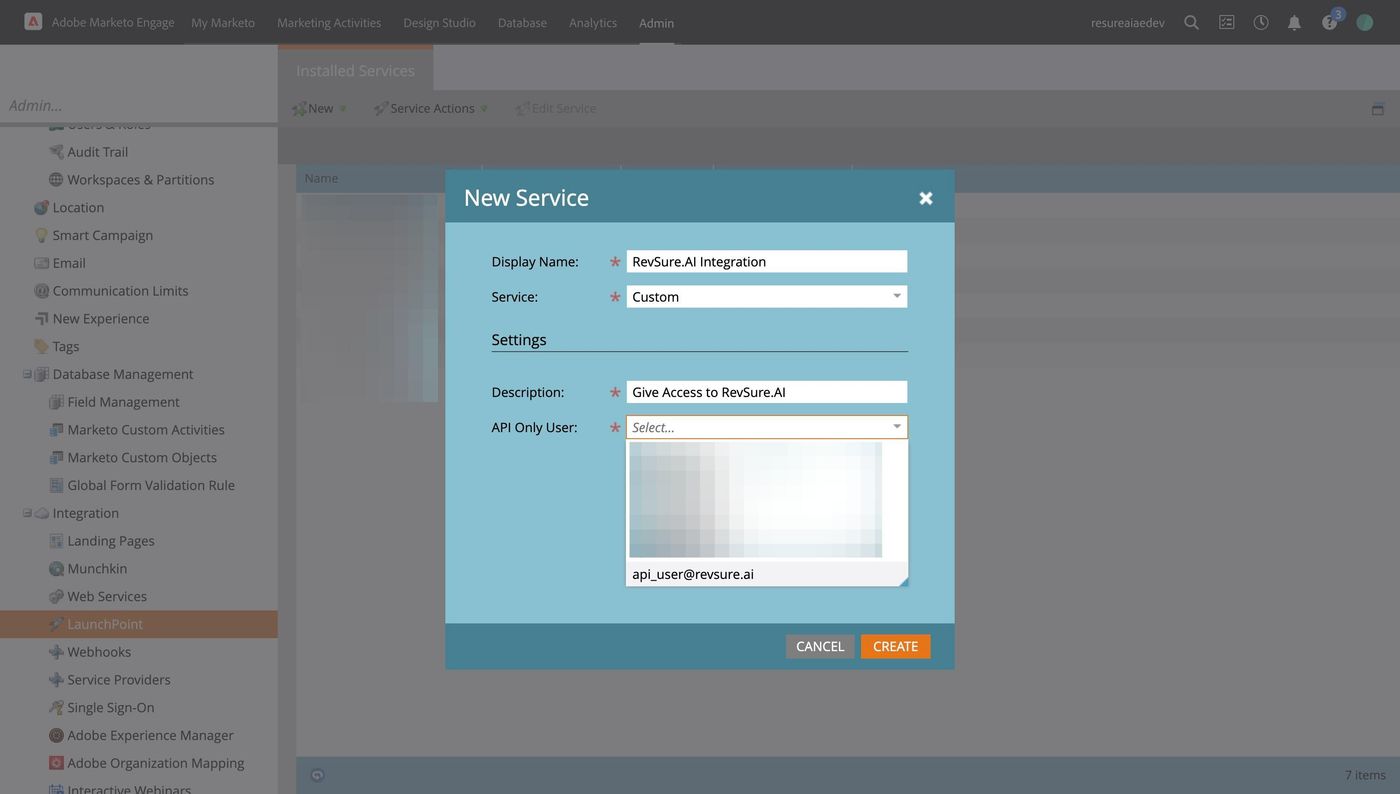
37. Click the "API Only User:" field

RevSure Marketo Integration Implementation Guide (figure 35)

38. Select the user created above

RevSure Marketo Integration Implementation Guide (figure 36)

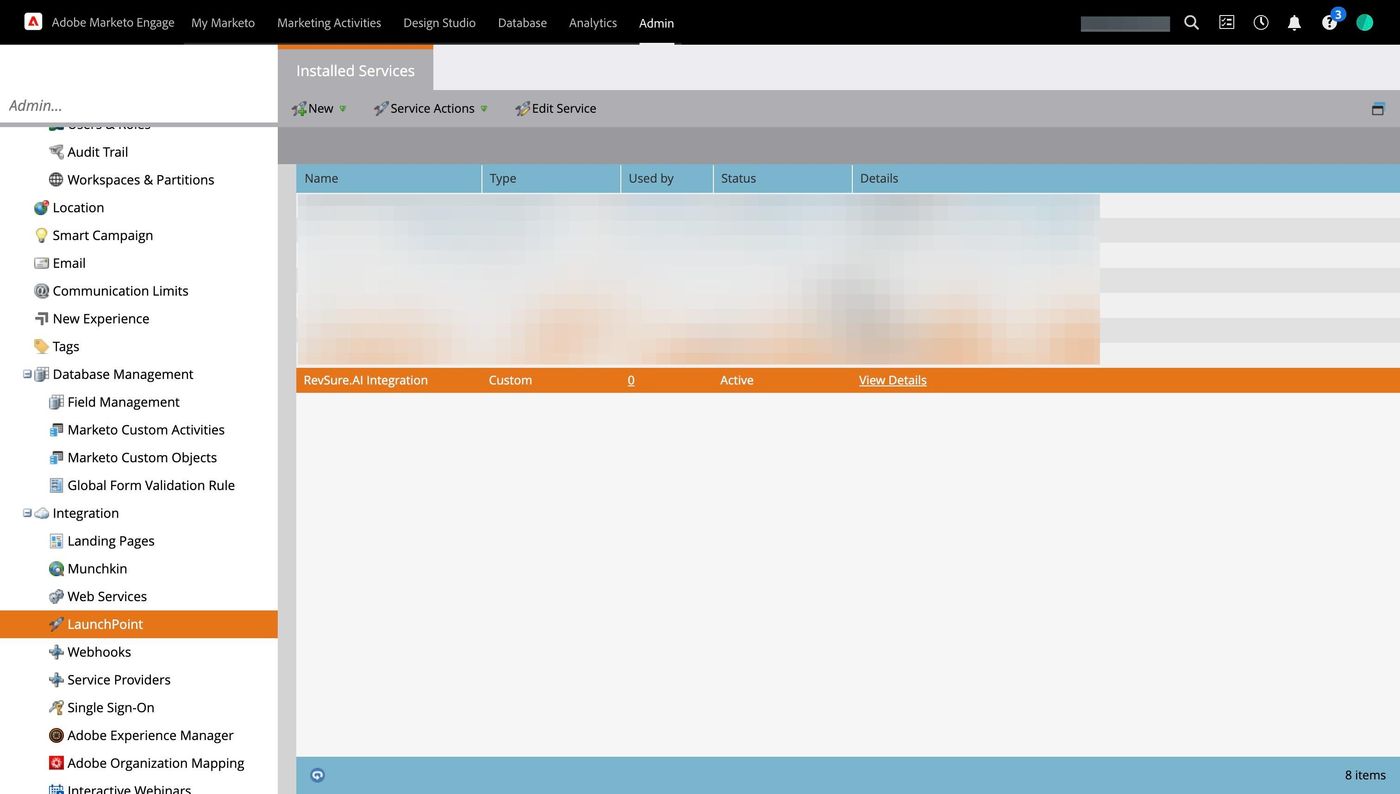
39. Click "CREATE"

RevSure Marketo Integration Implementation Guide (figure 37)

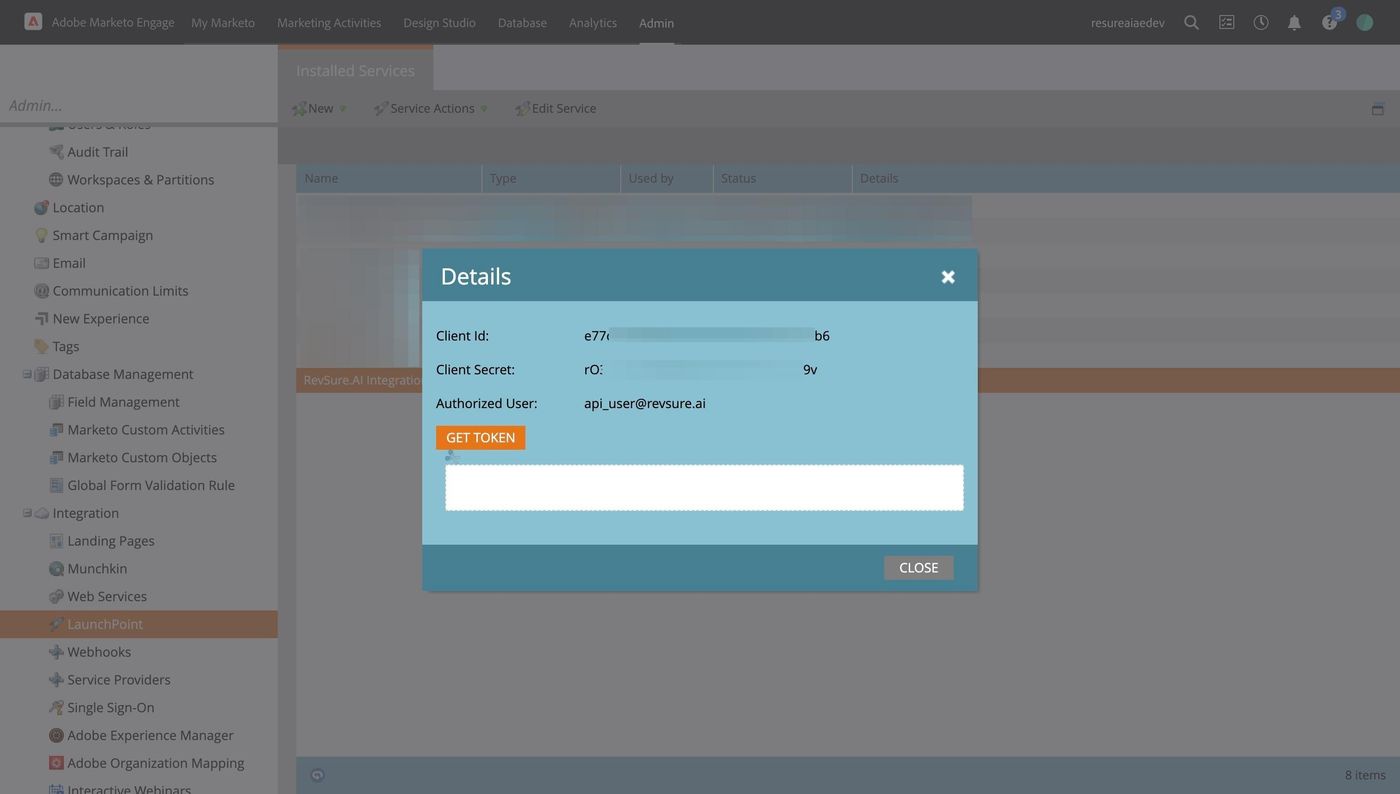
40. Click "View Details"

RevSure Marketo Integration Implementation Guide (figure 38)

41. Copy Client ID

RevSure Marketo Integration Implementation Guide (figure 39)

42. Navigate to RevSure tab and Paste the Client ID
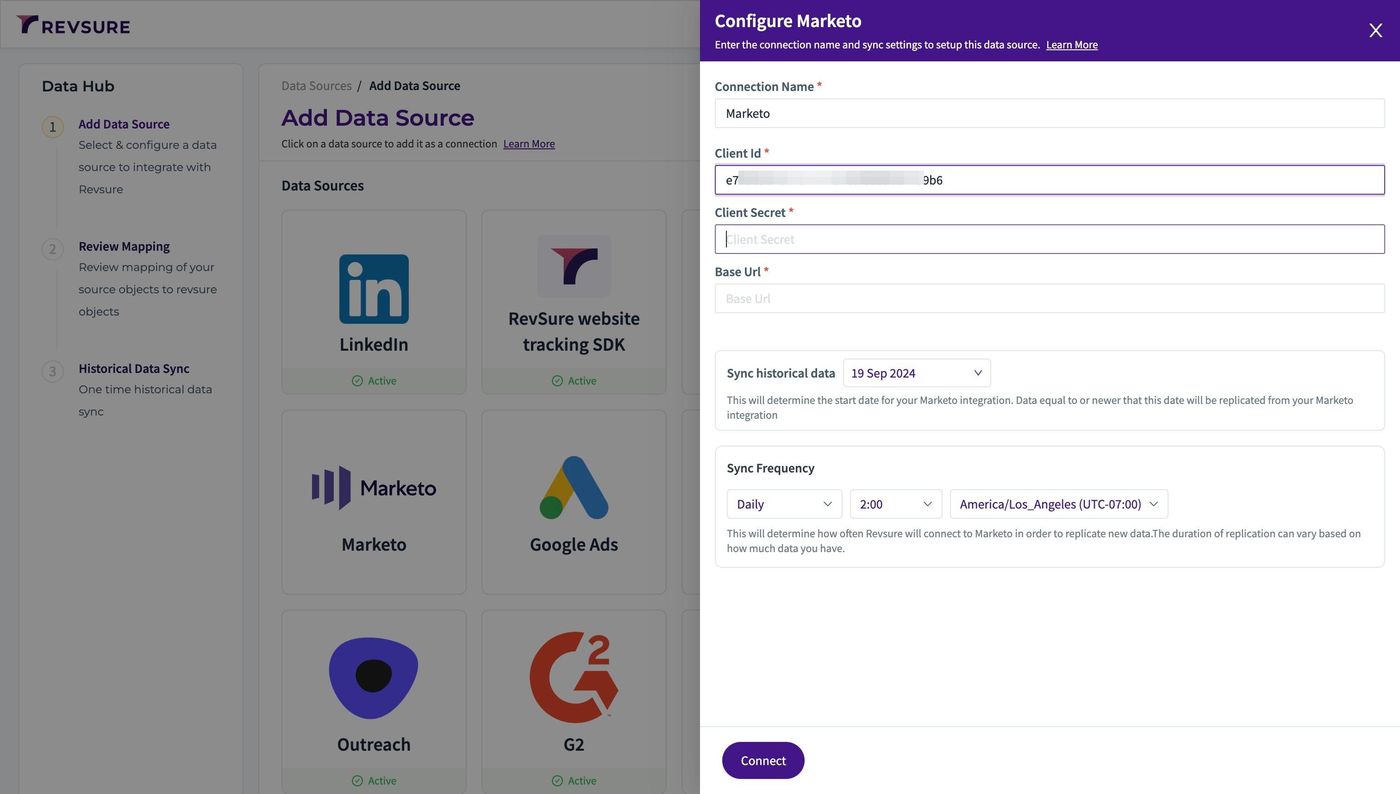
RevSure Marketo Integration Implementation Guide (figure 40)

43. Navigate to Marketo and Copy the Client Secret
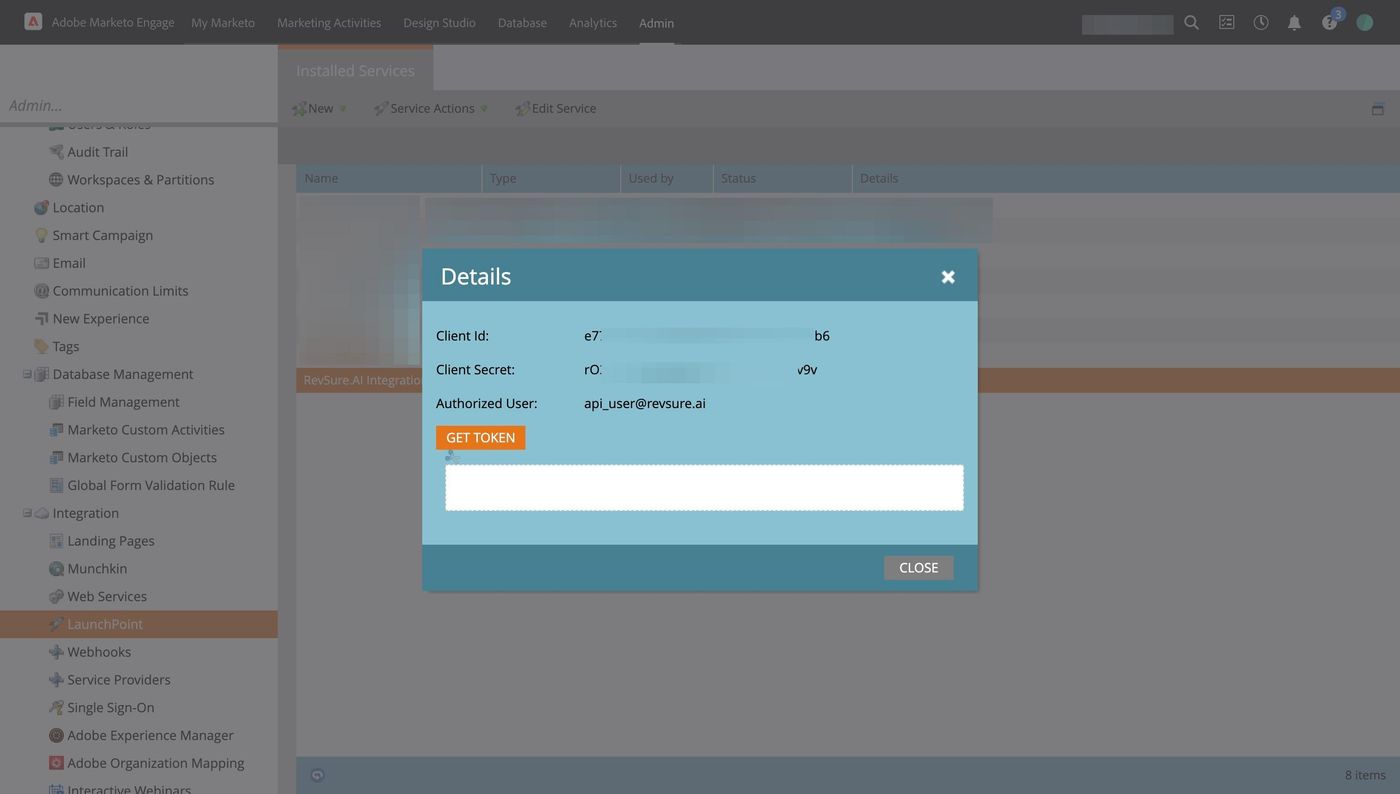
RevSure Marketo Integration Implementation Guide (figure 41)

44. Navigate to RevSure tab and Paste Client Secret
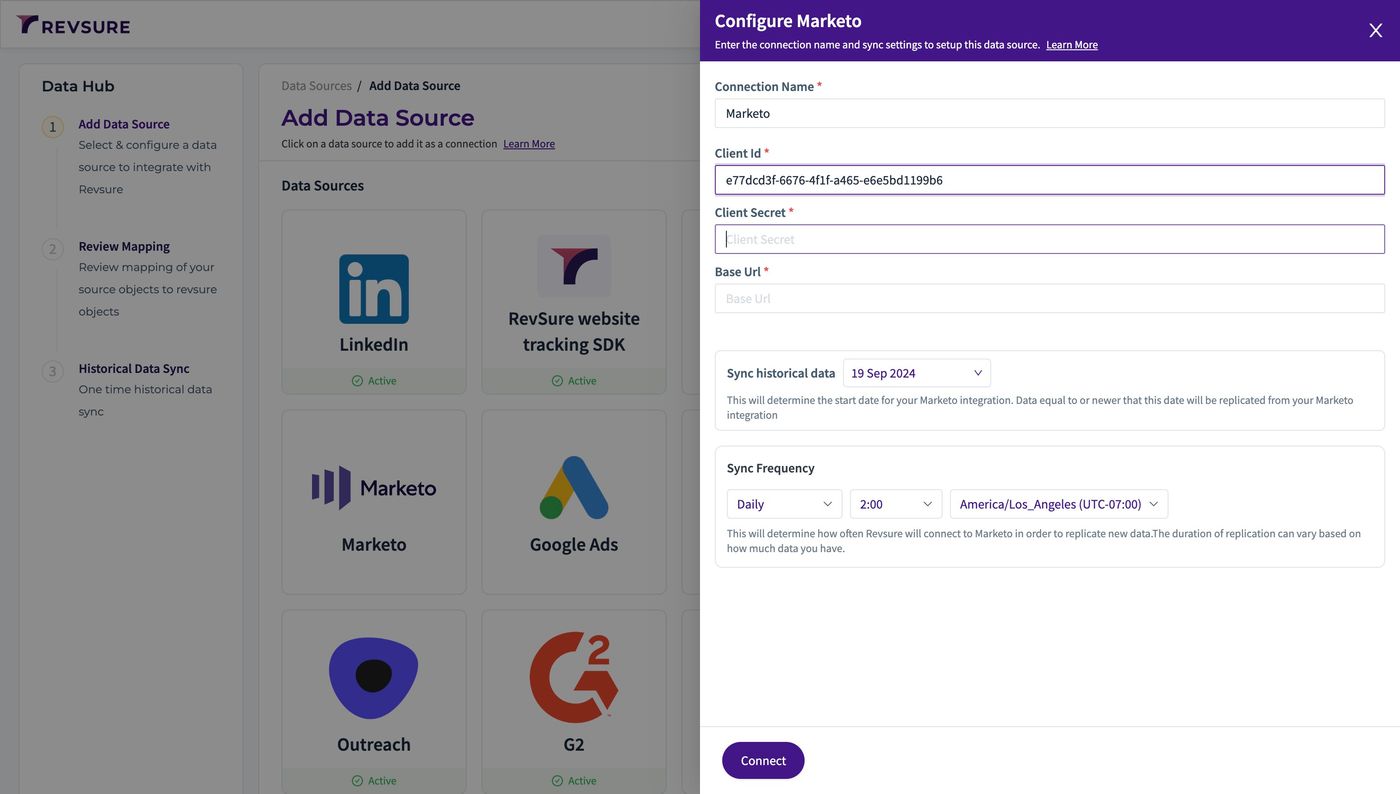
RevSure Marketo Integration Implementation Guide (figure 42)

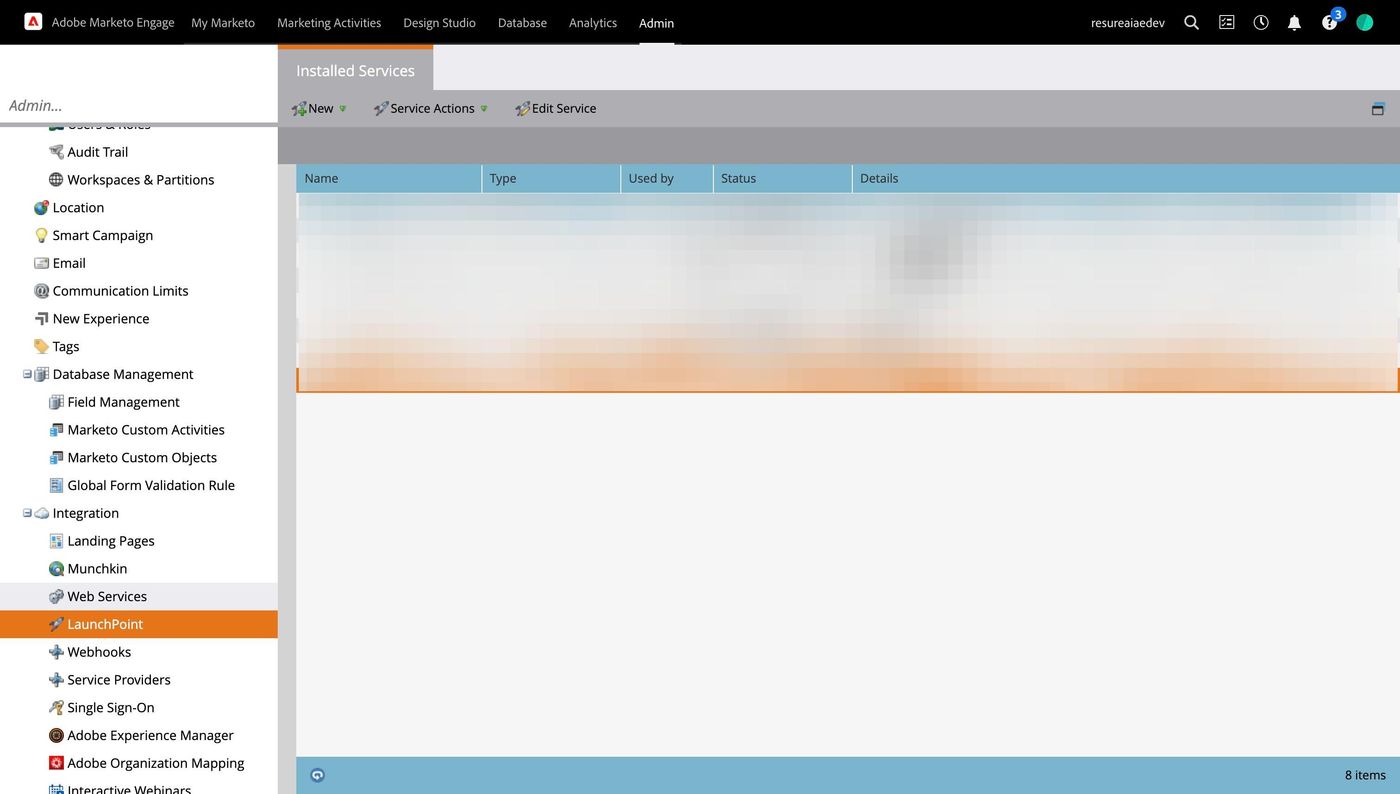
45. Navigate to Marketo tab and close the model
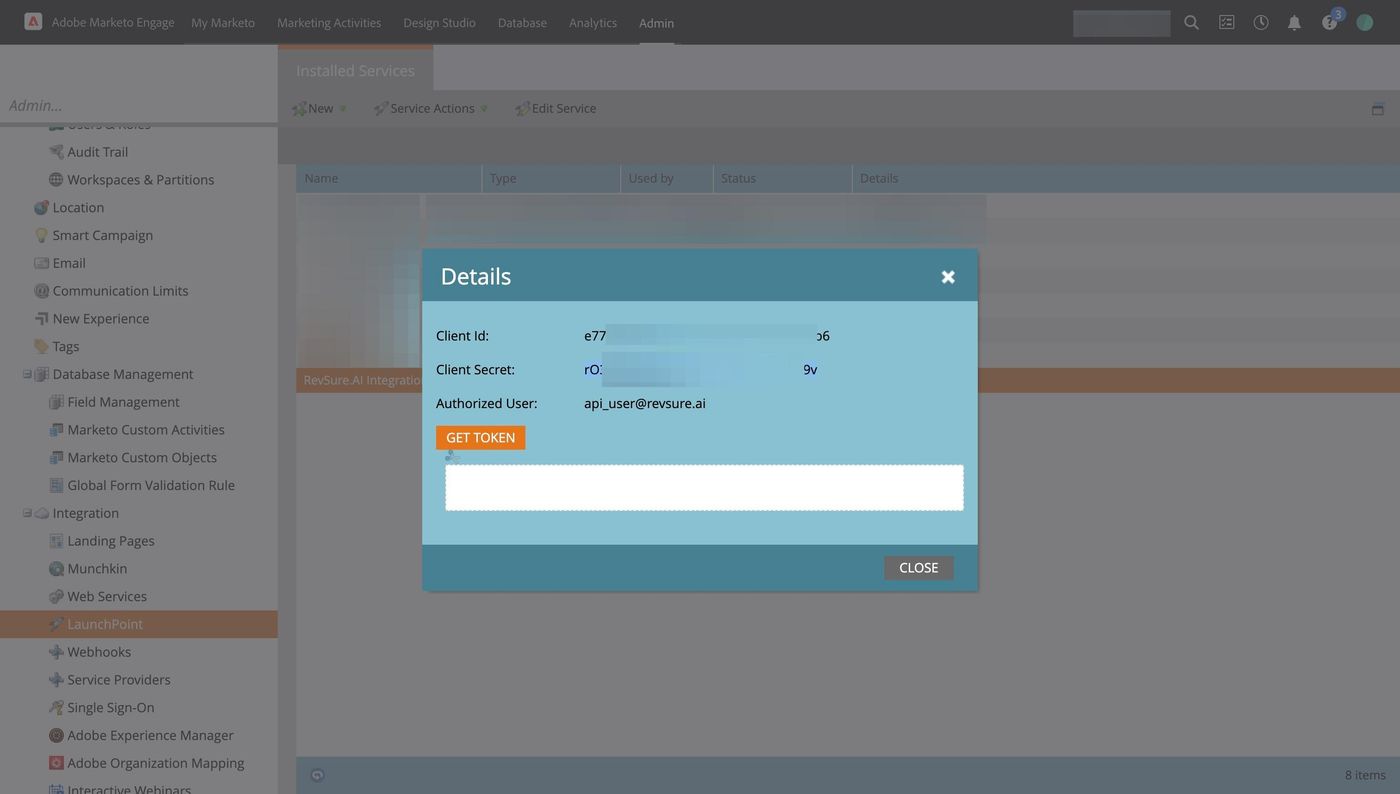
RevSure Marketo Integration Implementation Guide (figure 43)

46. Click on Web Services

RevSure Marketo Integration Implementation Guide (figure 44)

47. Copy the endpoint URL without /rest
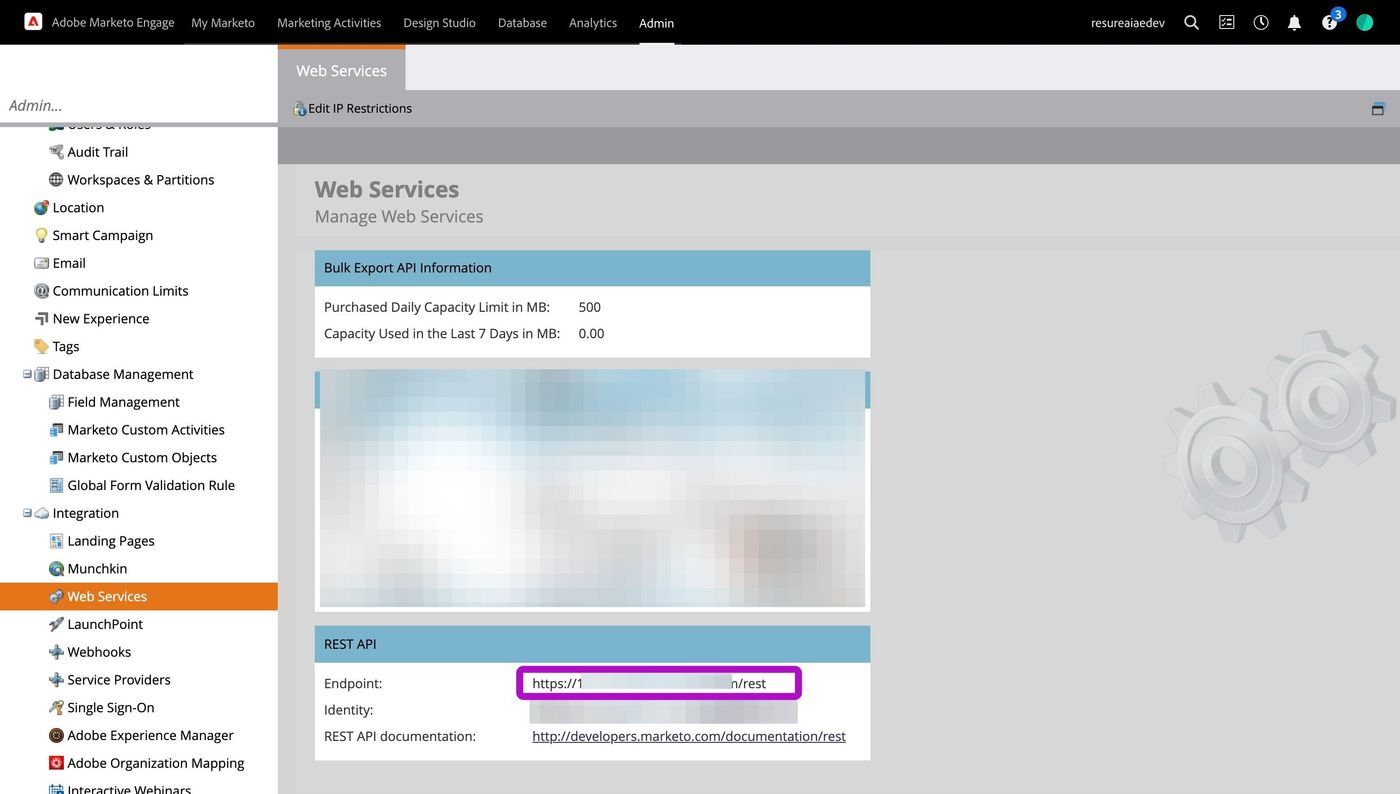
RevSure Marketo Integration Implementation Guide (figure 45)

48. Navigate to RevSure tab and Paste the URL (Example: [https://XXX-XXX-XXX.mktorest.com]
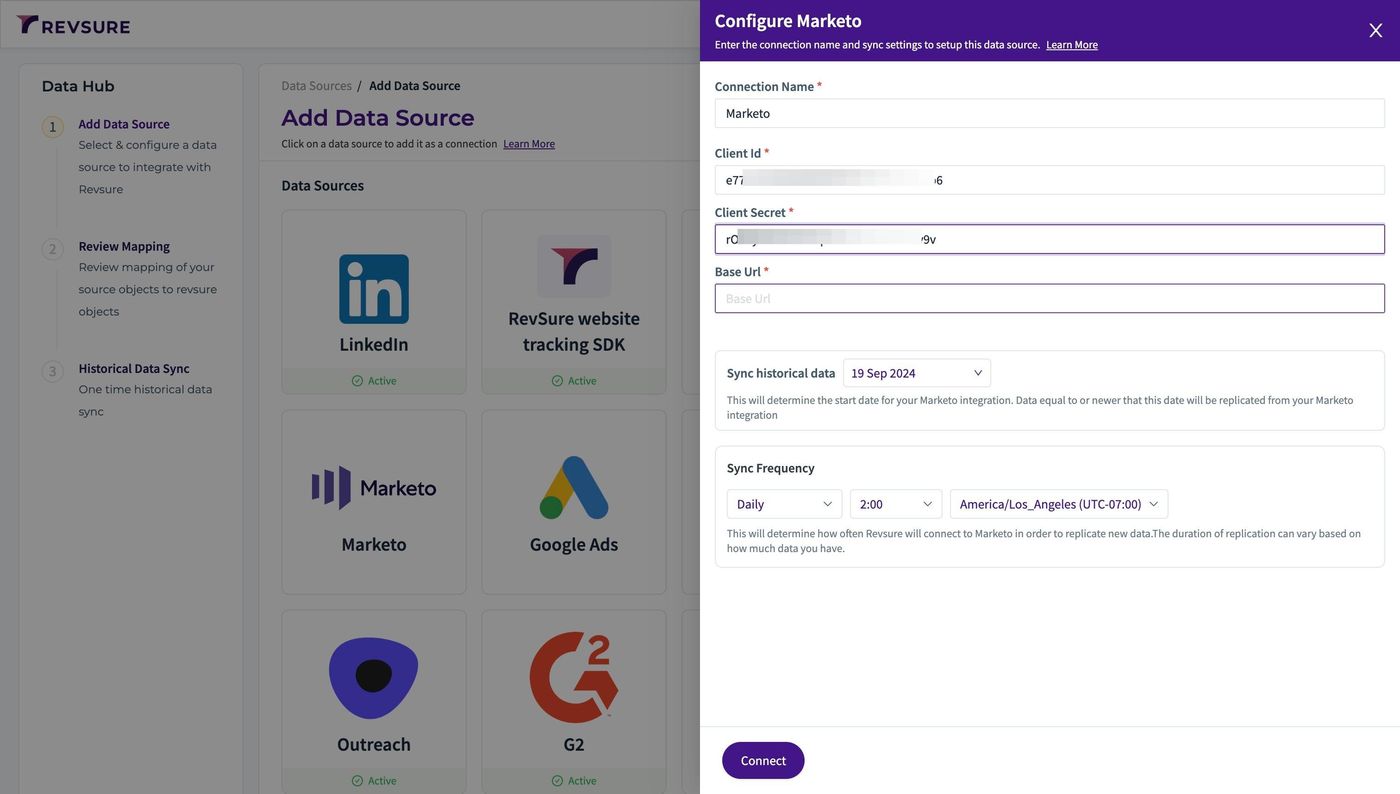
RevSure Marketo Integration Implementation Guide (figure 46)

49. Select historical date to sync from
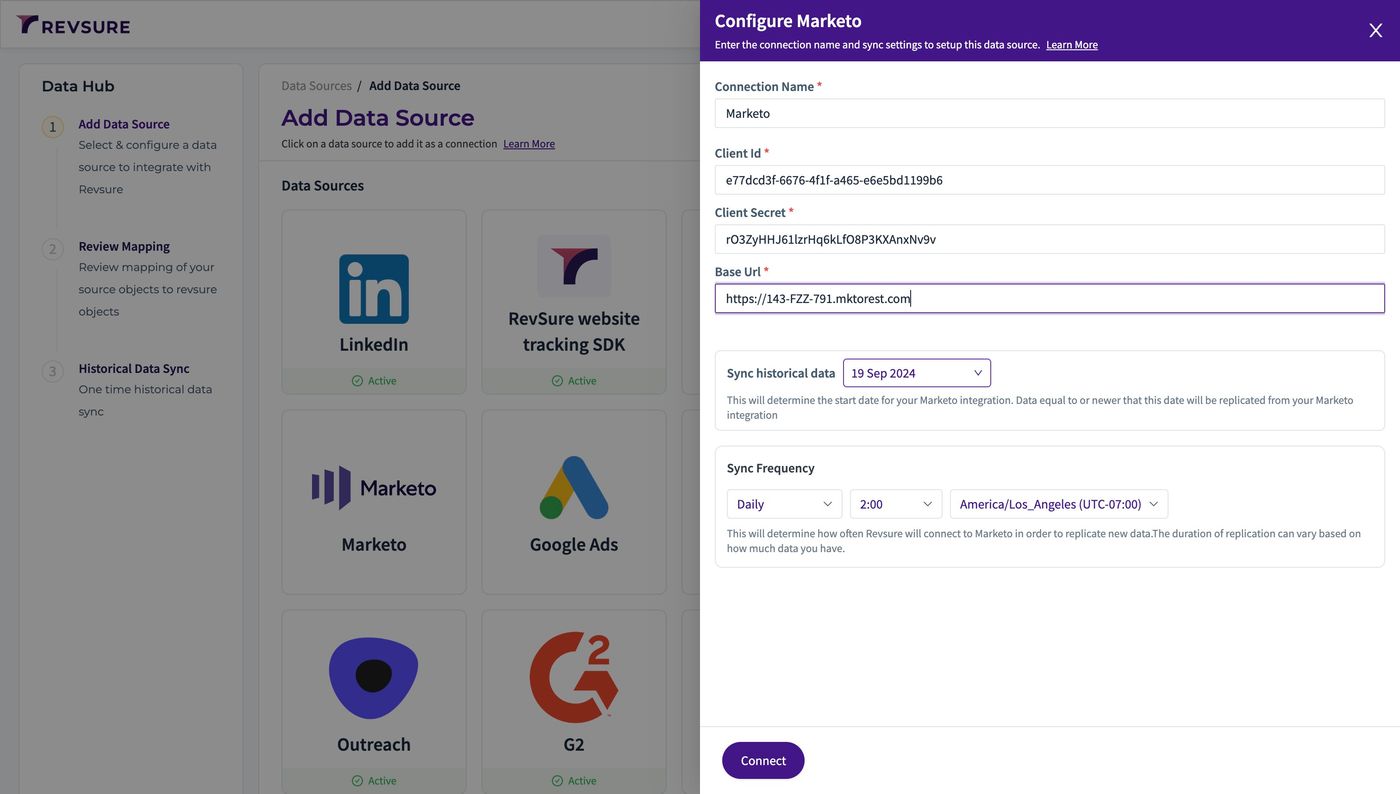
RevSure Marketo Integration Implementation Guide (figure 47)

50. Select sync frequency, time and timezone to trigger the sync
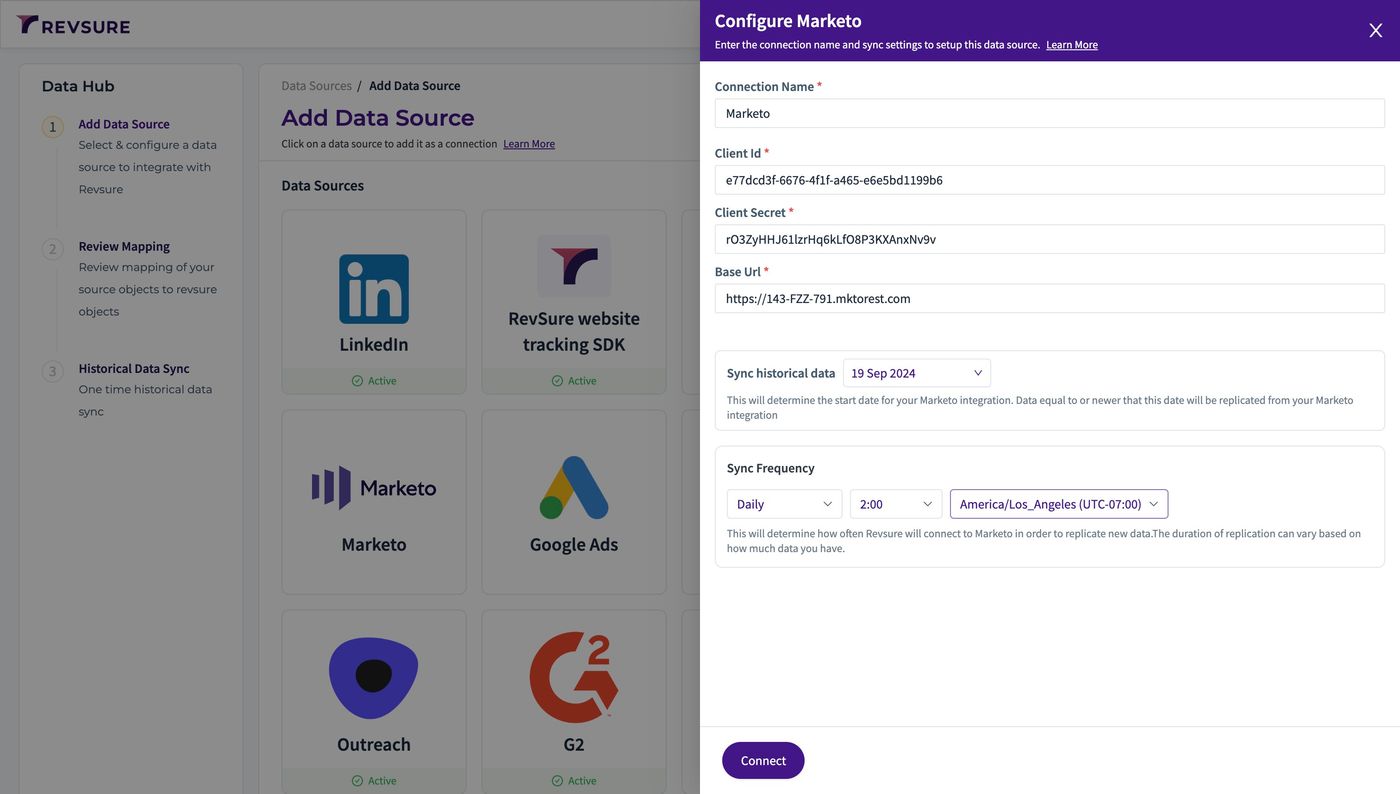
RevSure Marketo Integration Implementation Guide (figure 48)

51. Click "Connect"

RevSure Marketo Integration Implementation Guide (figure 49)

52. Click "CONFIRM MAPPING" to confirm mapping
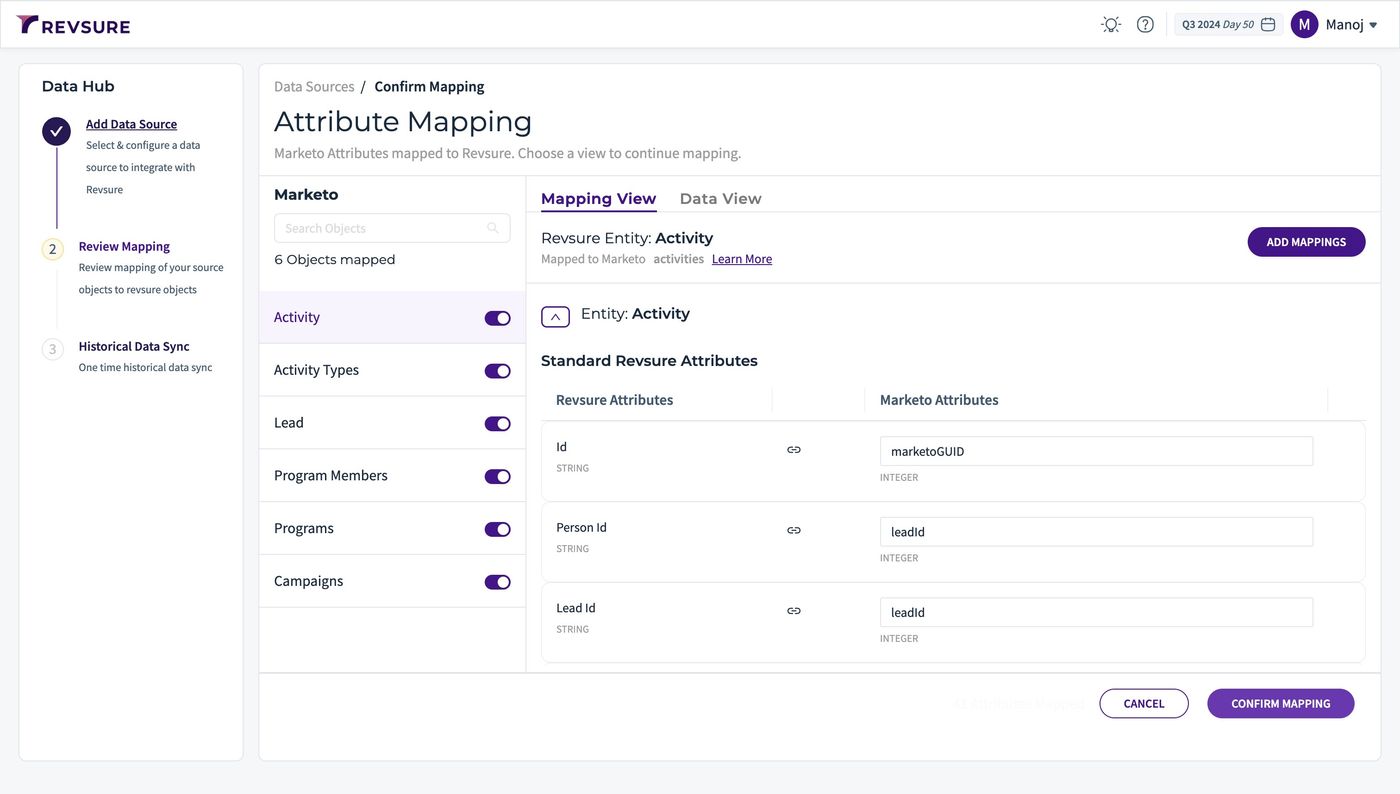
RevSure Marketo Integration Implementation Guide (figure 50)

53. Data source will be added, and you will be able to view sync status
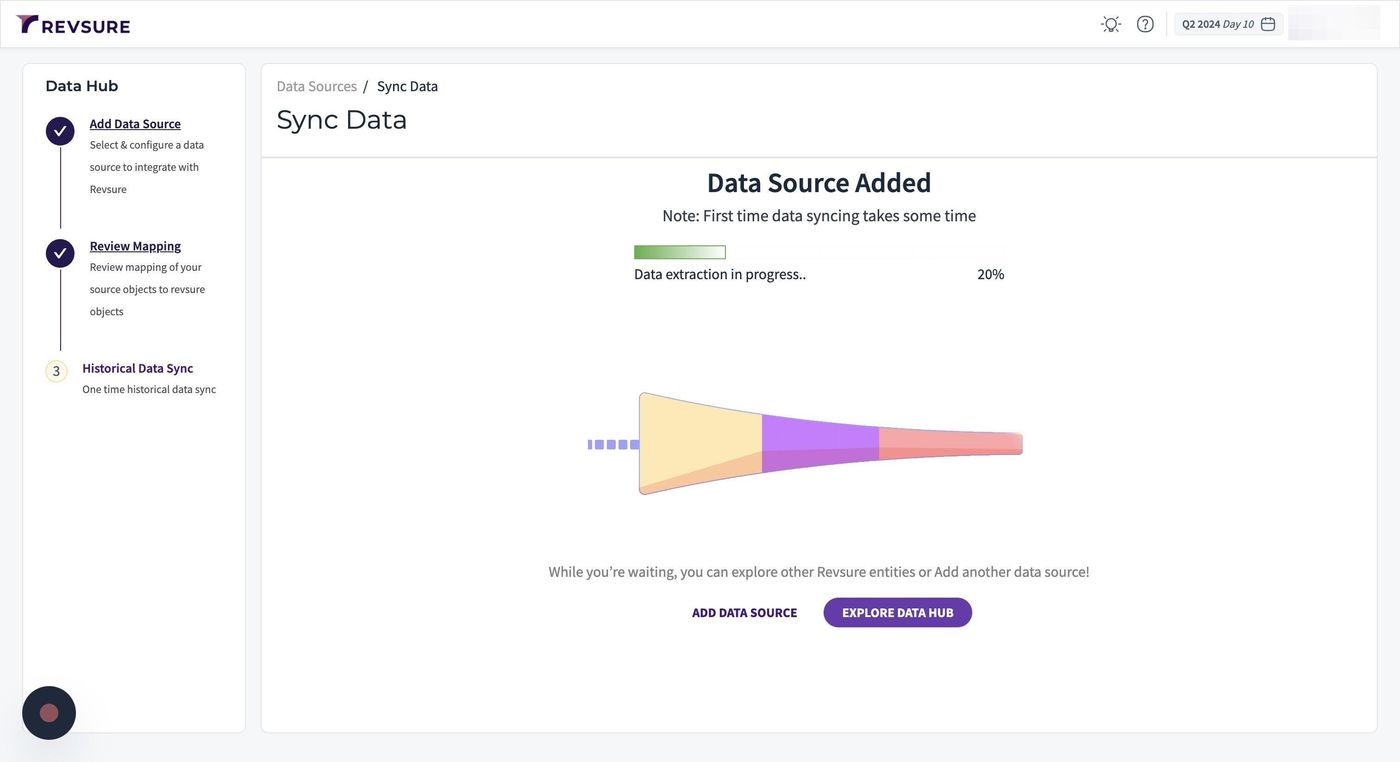
RevSure Marketo Integration Implementation Guide (figure 51)
Ready when your stack is

Still stuck? Bring it to the session

A RevSure engineer walks your exact setup on a 30-minute working session.